Set up Kit on the free plan: sender, first form and a test subscriber
How we set up WorkCue's real Kit account on the free plan: signup, onboarding, what the plan includes, the sender and mailing address, Recommendations, a first inline form and a test subscriber taken all the way to Confirmed, with the gotchas we hit.
This is the first guide in our Sell What You Know series. It covers opening a Kit account on the free plan, checking what the plan includes, setting the sender and mailing address, deciding on Recommendations, building one inline signup form and pushing a test subscriber through it, all the way to a confirmed row in Subscribers.
The account is WorkCue's real Kit account, the one that now runs our free scope checklist. We first opened it on October 7, 2026, during an earlier test run under a demo business name, and renamed it to WorkCue afterwards. Where a screen still showed that demo name, we've cropped it out or re-captured it from the WorkCue account. Every Kit screen, option and default described below is real. Subscribers in this guide are our own labelled test addresses, never real people.
We're not in Kit's affiliate program, so the links to Kit here are plain links and WorkCue earns nothing from them.
Step 1: Pick the free plan and create the account
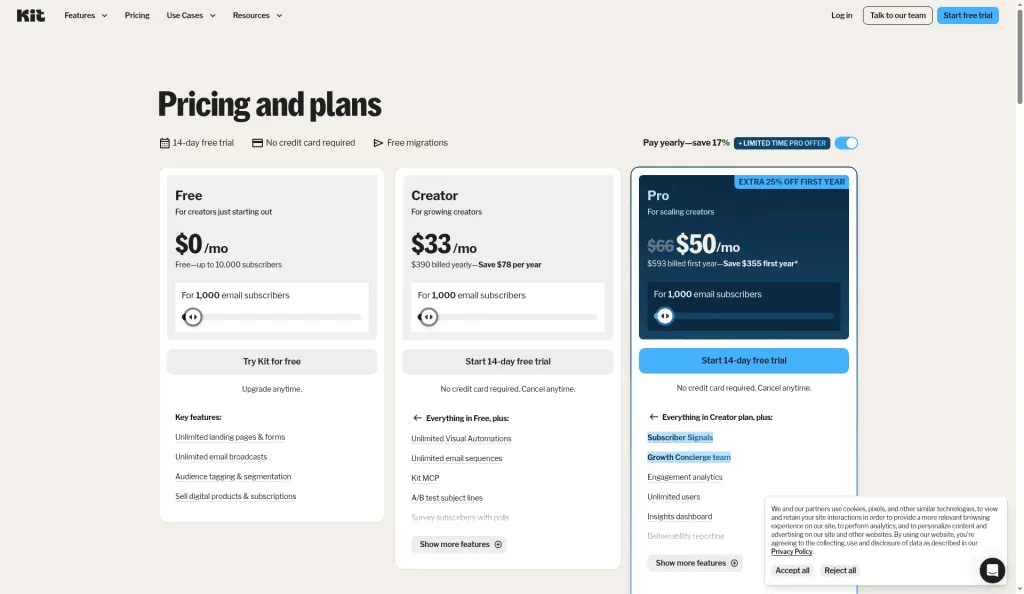
Go to Kit's pricing page and find the Free card. On our run it read "Free, up to 10,000 subscribers" with four key features: unlimited landing pages and forms, unlimited email broadcasts, audience tagging and segmentation, and selling digital products and subscriptions. The paid Creator plan sits next to it.
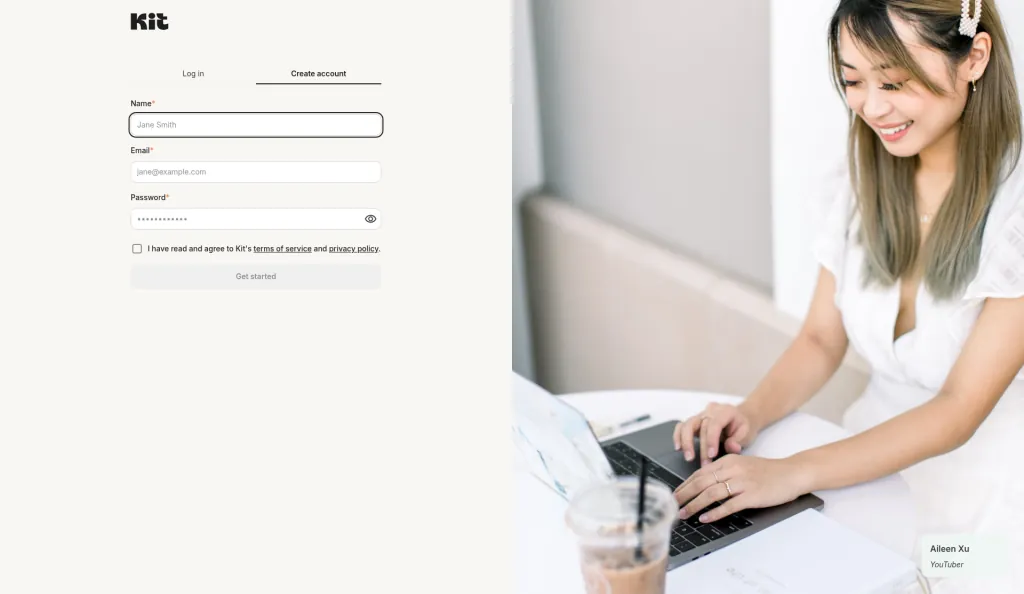
Click Try Kit for free. The Create account form asks for three things: name, email and password, plus a terms checkbox. No card, no phone number.
Step 2: Answer the onboarding questions
Kit runs a five-step onboarding with a progress list on the left. Kit doesn't let you run onboarding again on an existing account, so we can't show our answers for WorkCue. These are the real questions and options, in order:
- "Do you already use an email marketing tool?" Yes or No.
- "How big is your audience?" (it counts YouTube subscribers, Instagram followers and so on). Options run from 0 to 9,999 up to 100,000+. Picking one moves the screen on by itself.
- "What is the name of your business, newsletter, or brand?" Kit says this name appears on pages your subscribers see. It's prefilled with the account holder's name, so type your business name here. Ours is now
WorkCue. You can change it later, as we did. - "What is your website?" Optional. If you leave it blank, Kit offers to set one up for you. Ours is
https://useworkcue.com. - "What kind of creator are you?" Pick up to 3 from Coach, Educator, Entrepreneur, Blogger, Marketer, Author, YouTuber, plus a "More options" list.
- "What topics do you cover?" Pick up to 3 from 34 topics. Kit uses these to match you with similar creators.
- "Let's set up your profile." A profile picture upload (800 x 800 recommended). If you skip it, Kit asks "Are you sure you don't want to add a photo?" and explains that the photo helps other creators find you in the Creator Network.
- "Add a bio or blurb about your newsletter" Optional. You can leave it blank and click Finish.
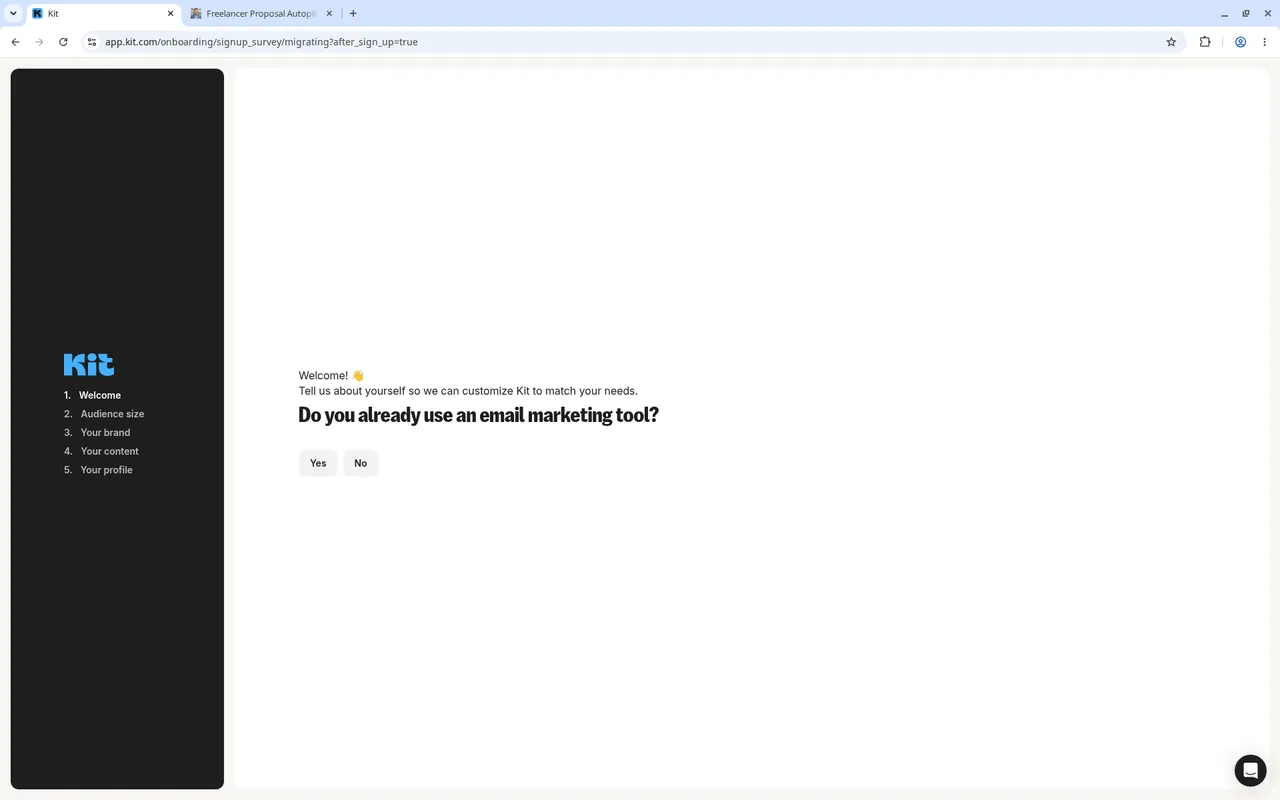
There was no first-name question, no list import and no plan picker.
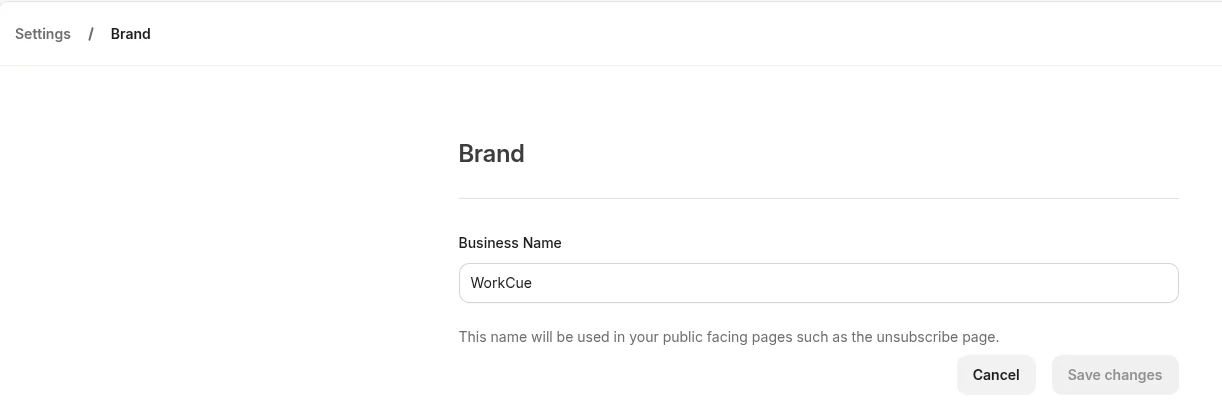
To change the business name later, go to Settings > Brand. The Business Name field there now reads WorkCue, and Kit notes: "This name will be used in your public facing pages such as the unsubscribe page."
Step 3: Confirm your account email first (gotcha 1)
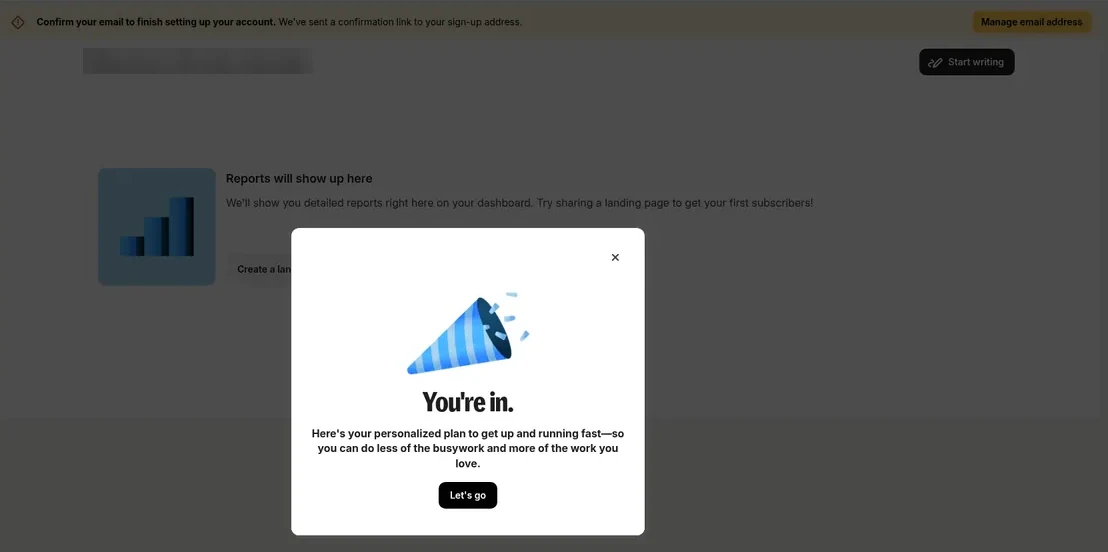
The dashboard opens with a "You're in." welcome modal and a yellow banner: "Confirm your email to finish setting up your account." The app works without it, so it's easy to skip. Don't.
In our run, two things stayed blocked until the account email was confirmed. The sender settings showed "You'll need to confirm your email before setting up additional email addresses", so we couldn't set a From name. And confirmation emails to new subscribers didn't arrive. Confirm the account from your inbox first.
Once the account was confirmed, Settings > Email showed an Email addresses table with one row: the account email, which was our Gmail address, as the default sender. Click the pencil next to the From name and type the name you want people to see in their inbox. We use Dan at WorkCue. Kit saved it ("Changes Saved") and showed a yellow note under the table: "[our Gmail address] is a free address. This may negatively impact your deliverability." Step 12 shows what that meant in practice.
Kit then sent one more email, "Verify your email address with Kit", from help@convertkit.com. It's separate from the account confirmation email, so look for both. Clicking its link brought us back to Settings > Email with the notice "Email address has been confirmed.", and the sender row read confirmed and Default.
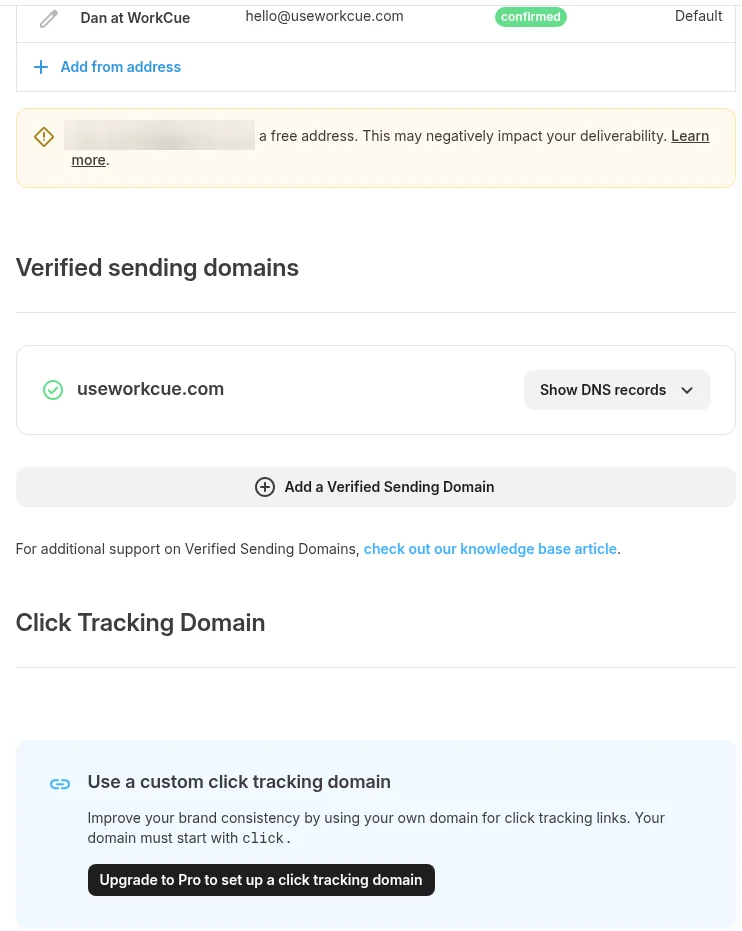
Where we ended up. A Gmail sender isn't good enough for a real list, so we later added hello@useworkcue.com with the From name "Dan at WorkCue", verified our domain in Kit and made that address the default. All of that works on the free plan; our verified sending domain guide has every step. This is our sender now:
Step 4: Check what the free plan includes
Open Settings > Billing. Under My Plan it showed Free, 10,000 subscribers, $0/month, with a usage bar at 0 / 10,000. Below it is an "Upgrade to the Creator Plan" box at $39/month, listing what Creator adds: unlimited advanced Visual Automations, fully customizable Recommendations, unlimited email sequences, and access to all integrations, RSS and other automation tools.
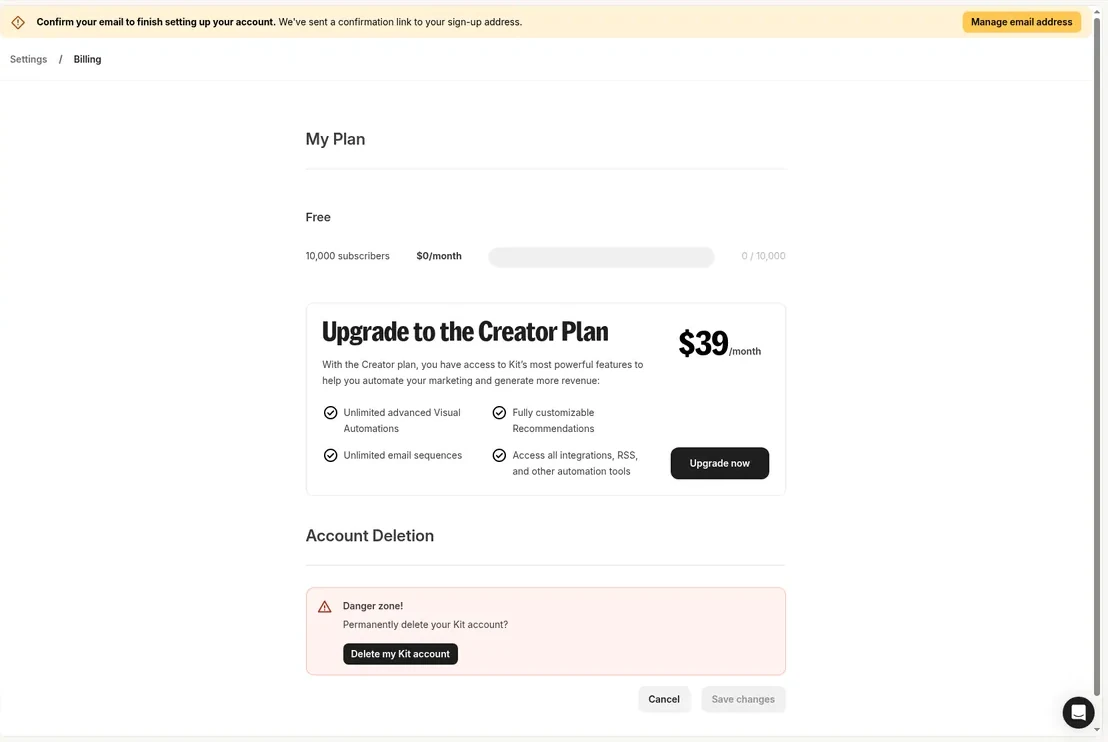
The billing page doesn't spell out the free automation limit. Kit's help center describes the free plan as including one basic visual automation with one email sequence, which is why the Creator box leads with "unlimited". Plan around one automation if you stay on Free.
Step 5: Sender and mailing address defaults
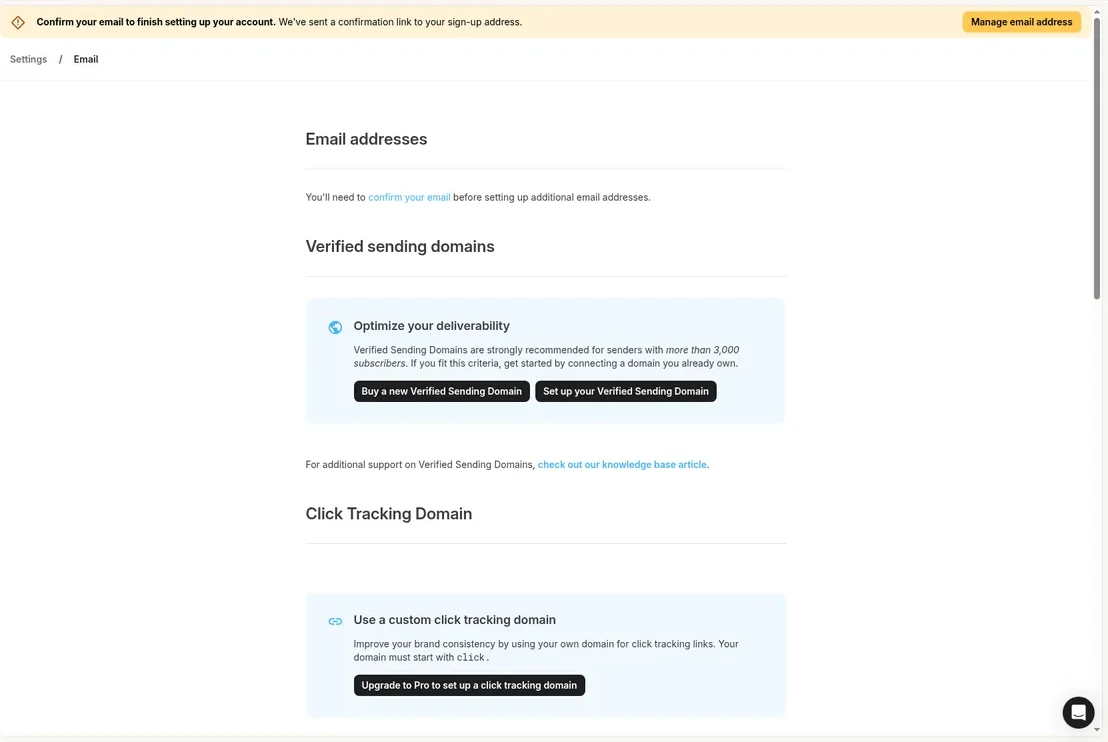
Open Settings > Email. Before the account email was confirmed, it showed three sections:
- Email addresses. Blocked until you confirm the account email (see Step 3). Until then, emails go out from the account email you signed up with.
- Verified sending domains. Kit says these are "strongly recommended for senders with more than 3,000 subscribers". We didn't wait for 3,000; see Step 12.
- Click Tracking Domain. A custom click tracking domain needs Kit Pro.
Scroll down to Mailing address. Anti-spam laws require a physical address at the bottom of marketing emails, and Kit says: "You can use our address if you don't have one ready." The fields come prefilled with Kit's own address: 600 1st Ave, Ste 330 PMB 92768, Seattle, WA 98104-2246, USA.
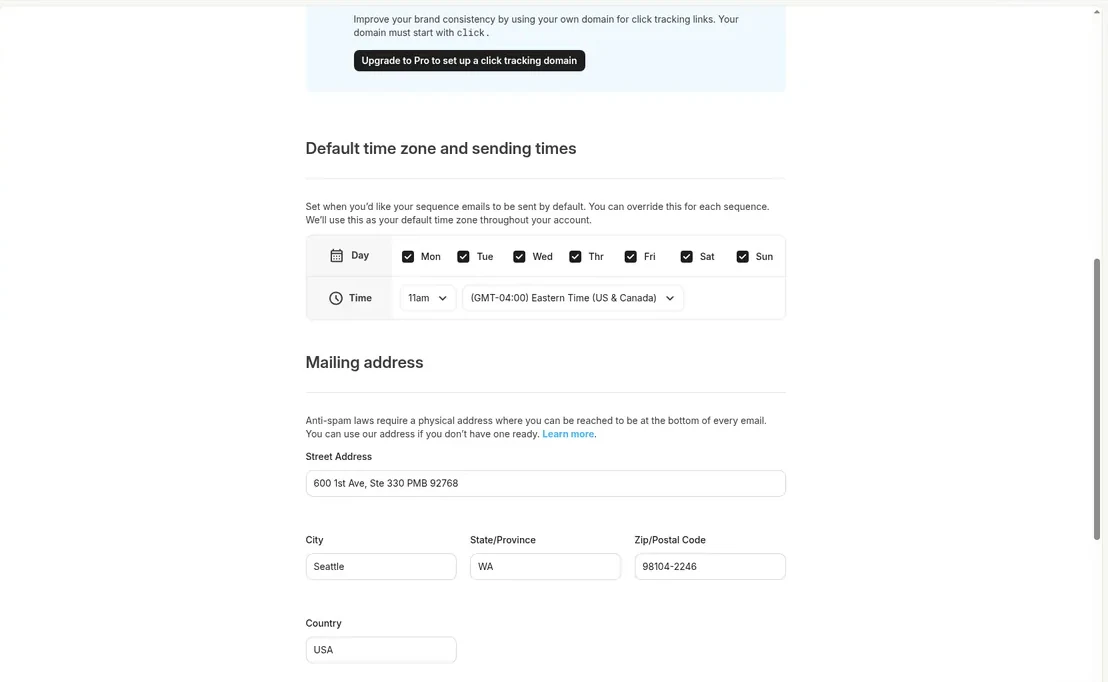
What that means: you can start sending without typing in an address, and every email footer will show Kit's Seattle mailbox until you change it. For a real business, put in a business address or a PO box, so the footer points to you. Don't use your home address: it goes out in every email.
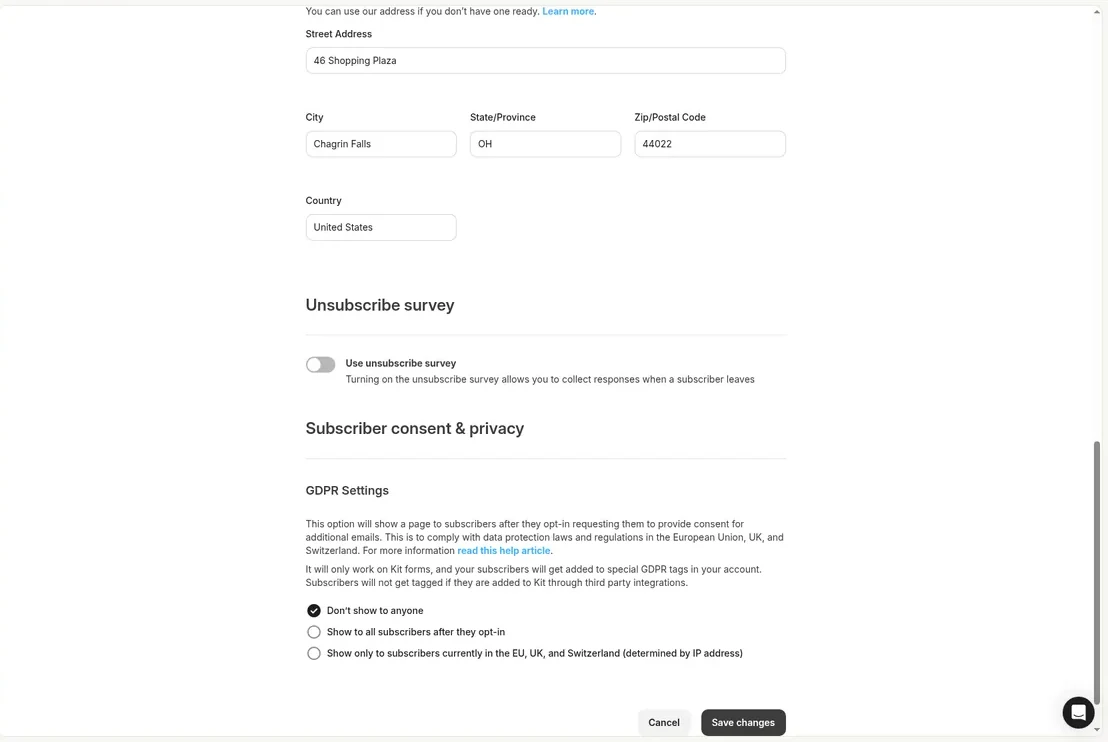
To replace it, stay in Settings > Email > Mailing address, fill in Street Address, City, State/Province, Zip/Postal Code and Country, and click Save changes. There's no business or company name line in this section. We use WorkCue's business address, 46 Shopping Plaza, Chagrin Falls, OH 44022, and it now appears in the footer of every WorkCue email, including the confirmation email in our lead magnet guide.
Step 6: Decide on Recommendations (gotcha 2)
Recommendations is Kit's Creator Network feature: Kit suggests other creators' newsletters to people who sign up through your forms, and they can recommend yours. On a new free account it's on by default. The first time we opened Audience growth > Recommendations, Kit showed a "You've enabled Recommendations / You're all set to grow" modal with five matched creators.
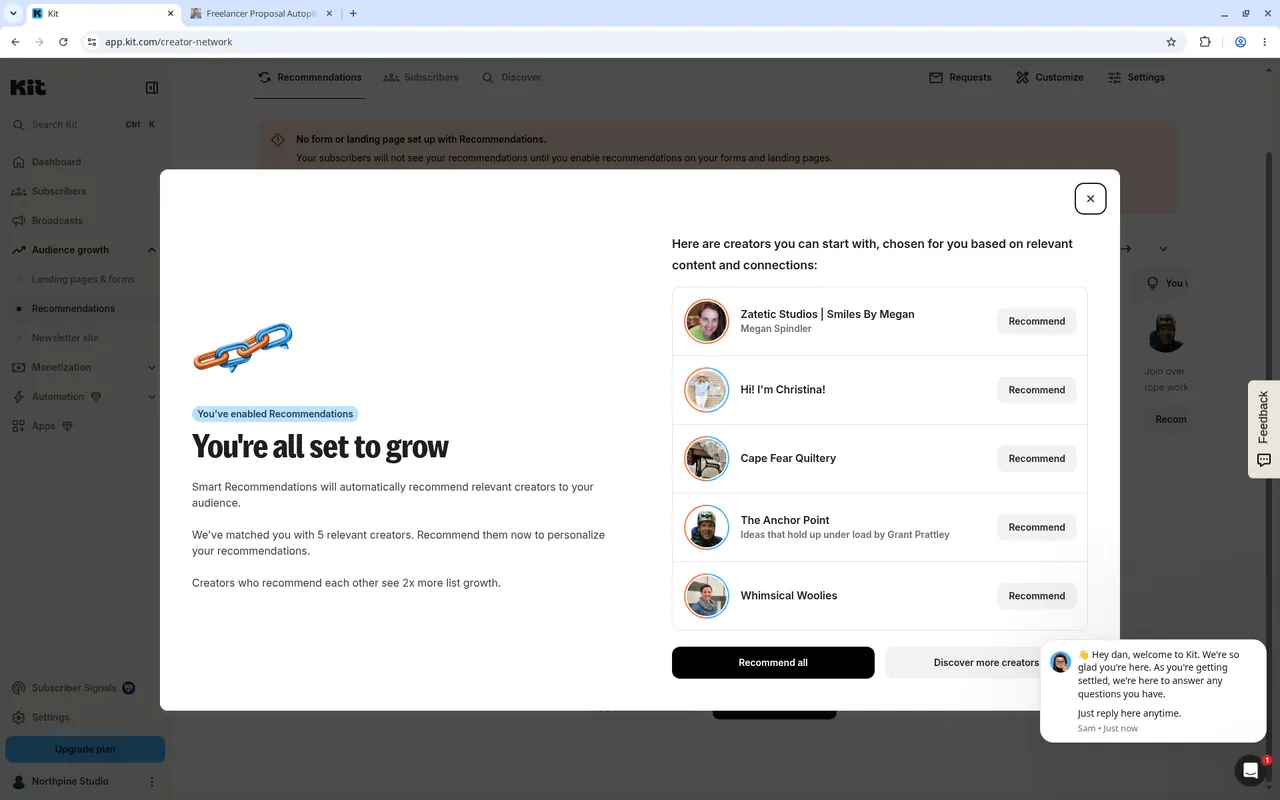
We turned it off and have left it off on the WorkCue account for now. Someone who signs up for our checklist should get the checklist, not a list of other newsletters straight after. You may decide differently: it can help a new list grow, and you can turn it back on any time.
To switch it off:
- Close the modal and click Settings on the Recommendations page.
- Click Turn off Recommendations (bottom left). Kit warns that you won't be able to recommend or be recommended, and that you'll be removed from the Creator Network.
- Turn off Enable by default, which otherwise adds Recommendations to new landing pages and forms automatically.
- Click Save. The button now reads Turn on Recommendations.
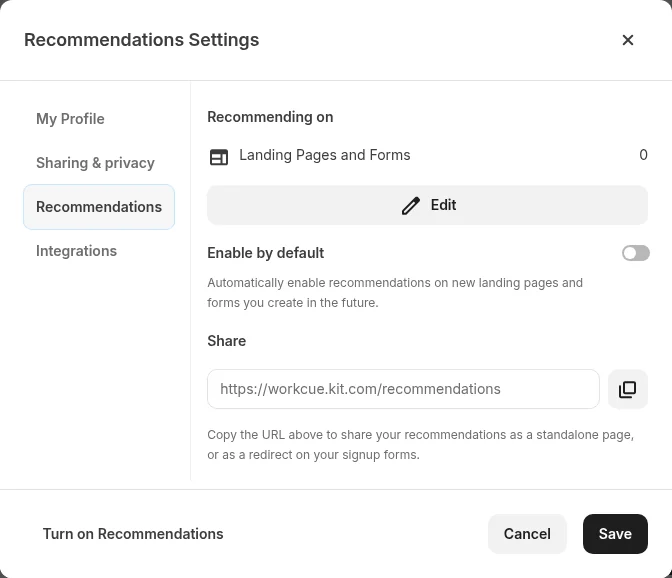
The gotcha: when we visited the Recommendations page again, Kit showed the same "You've enabled Recommendations" modal. It happened again when we came back to re-capture these screens for WorkCue: the modal popped up on page load, while Settings still said Turn on Recommendations. That's a confusing moment, and we can only report what the screens showed. Don't trust the modal. Open Settings and check the bottom-left button. If it says "Turn on Recommendations", it's off. The Subscribers page also keeps a "Grow your list 30% faster with Recommendations" banner either way.
Step 7: Build the first inline form
Go to Audience growth > Landing pages & forms, create a new form and choose Inline. Kit offers nine inline templates: Charlotte, Clare, Cocoa, Mills, Monterey, Pine, Poplar, Powell and Rainier. We used Mills, the simplest one that still has a headline and a subheader.
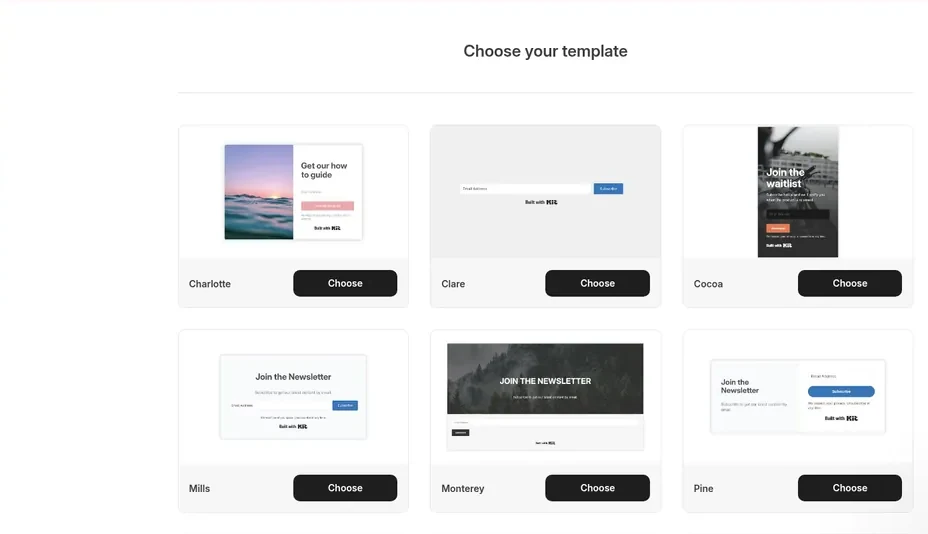
Make your edits in the editor's right-hand panel: the form name (only you see it), the headline, a one-line subheader that says what people will get, the button text and colours. Add a First Name field under the email field if you want to greet people by name.
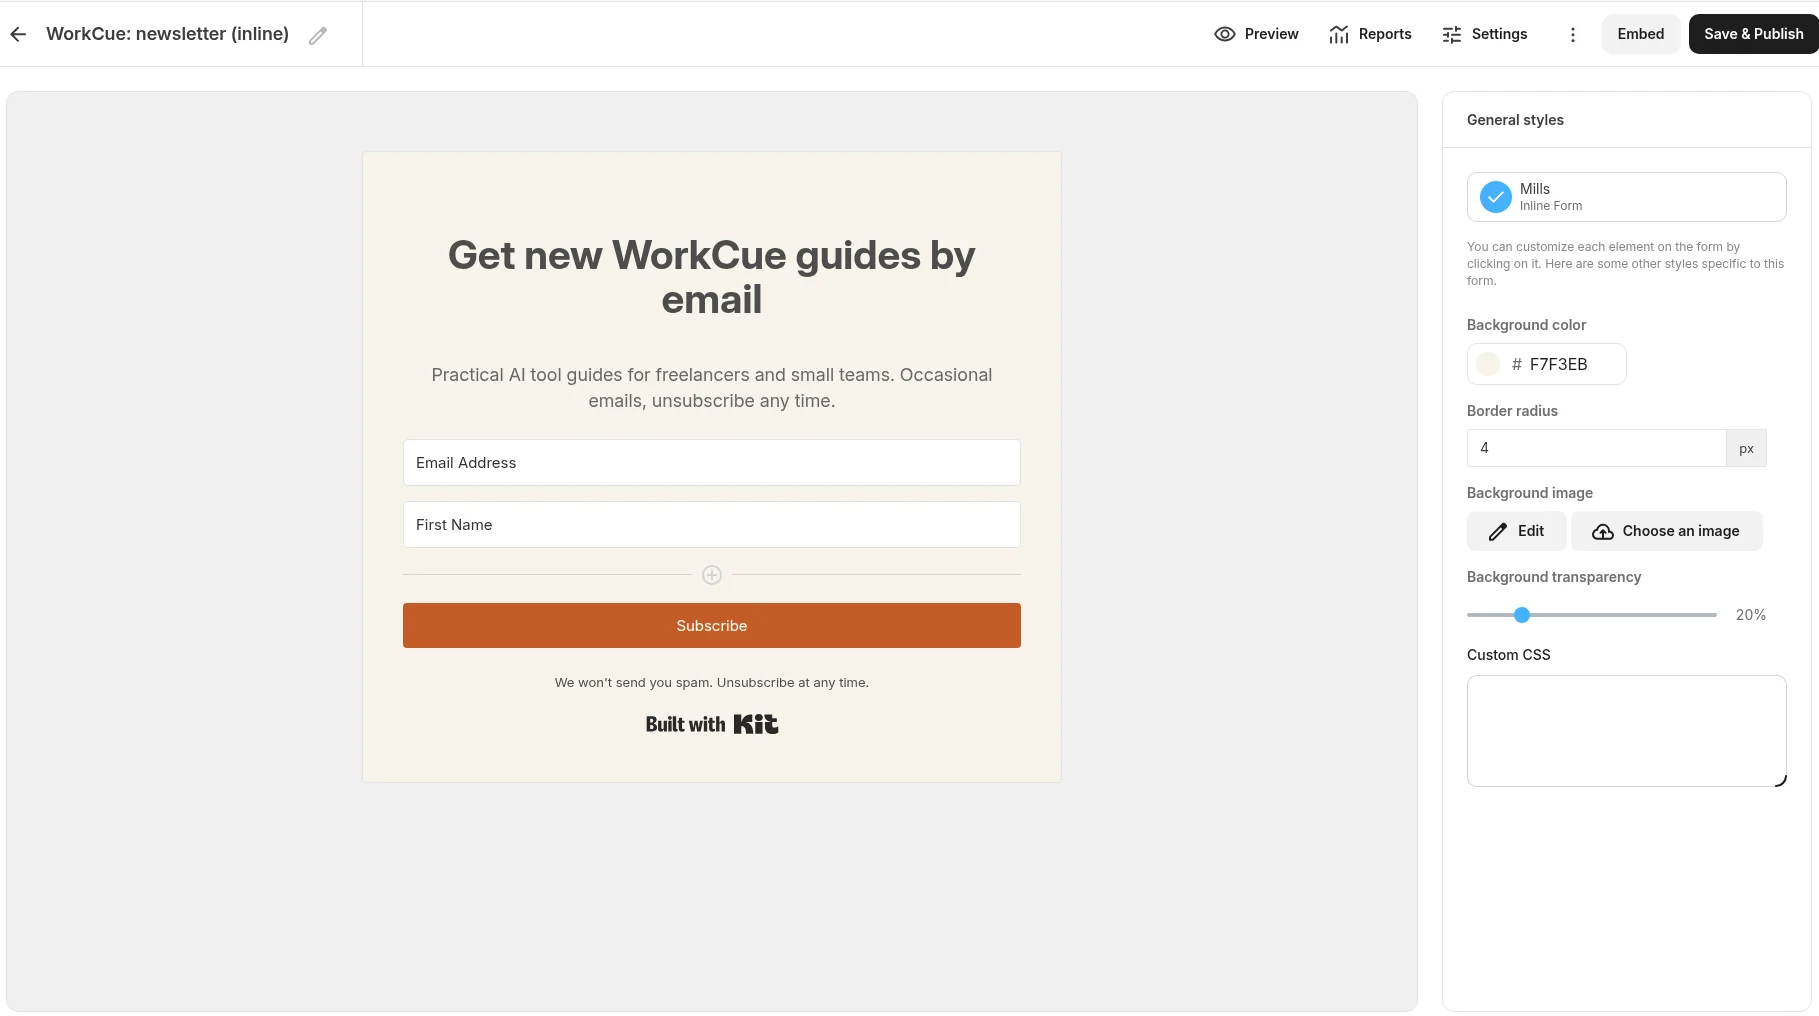
Our WorkCue form, as built:
- Form name:
WorkCue: newsletter (inline) - Template: Mills
- Headline: "Get new WorkCue guides by email"
- Subheader: "Practical AI tool guides for freelancers and small teams. Occasional emails, unsubscribe any time."
- Fields: Email Address, then First Name (we added it as a custom field)
- Button: "Subscribe", colour
#C45C26 - Form background:
#F7F3EB - Small print: we kept the template's "We won't send you spam. Unsubscribe at any time." The "Built with Kit" badge sits under it on the free plan.
Step 8: Form settings and the confirmation email
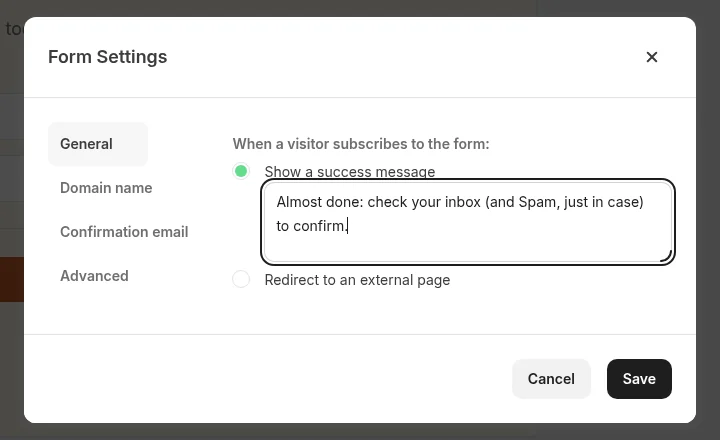
Open the form's Settings. The Form Settings dialog has four tabs: General, Domain name, Confirmation email and Advanced. On General, "When a visitor subscribes to the form" you can Show a success message or Redirect to an external page. The default success message is "Success! Now check your email to confirm your subscription."
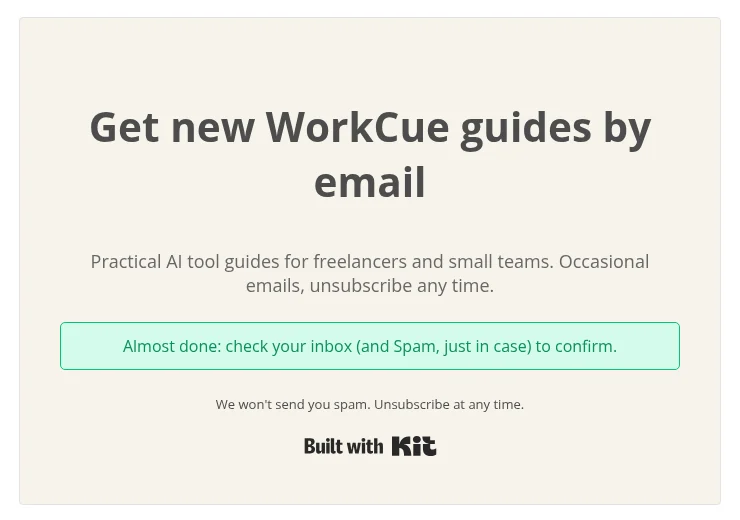
We wrote our own, so people know to look in Spam if the email doesn't show up: "Almost done: check your inbox (and Spam, just in case) to confirm."
On the Confirmation email tab, Send confirmation email is checked by default, which means double opt-in is on. Auto-confirm new subscribers is unchecked by default, on our first run and again on the WorkCue form. We left both alone. The same tab sets where people go after they confirm; the default is https://app.kit.com/confirm-subscription, Kit's own page (see Step 13). Here's Kit's default email:
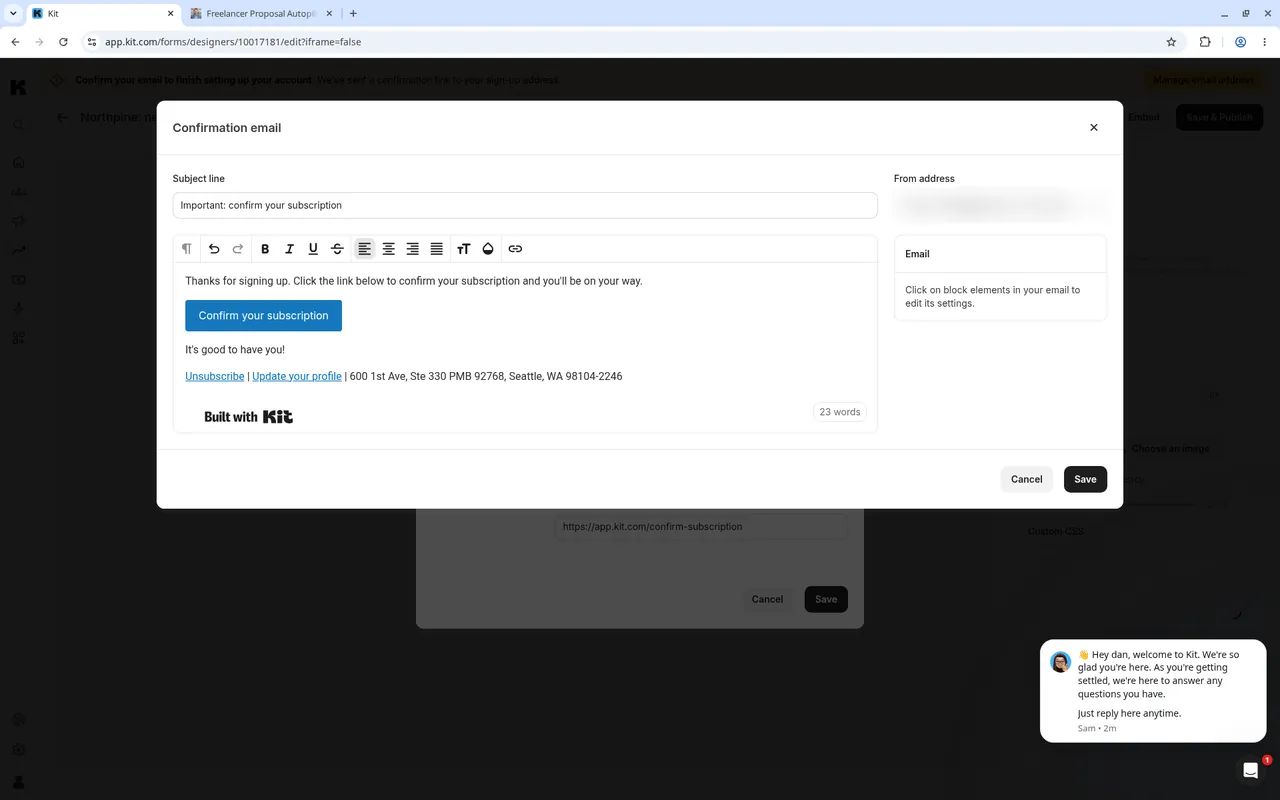
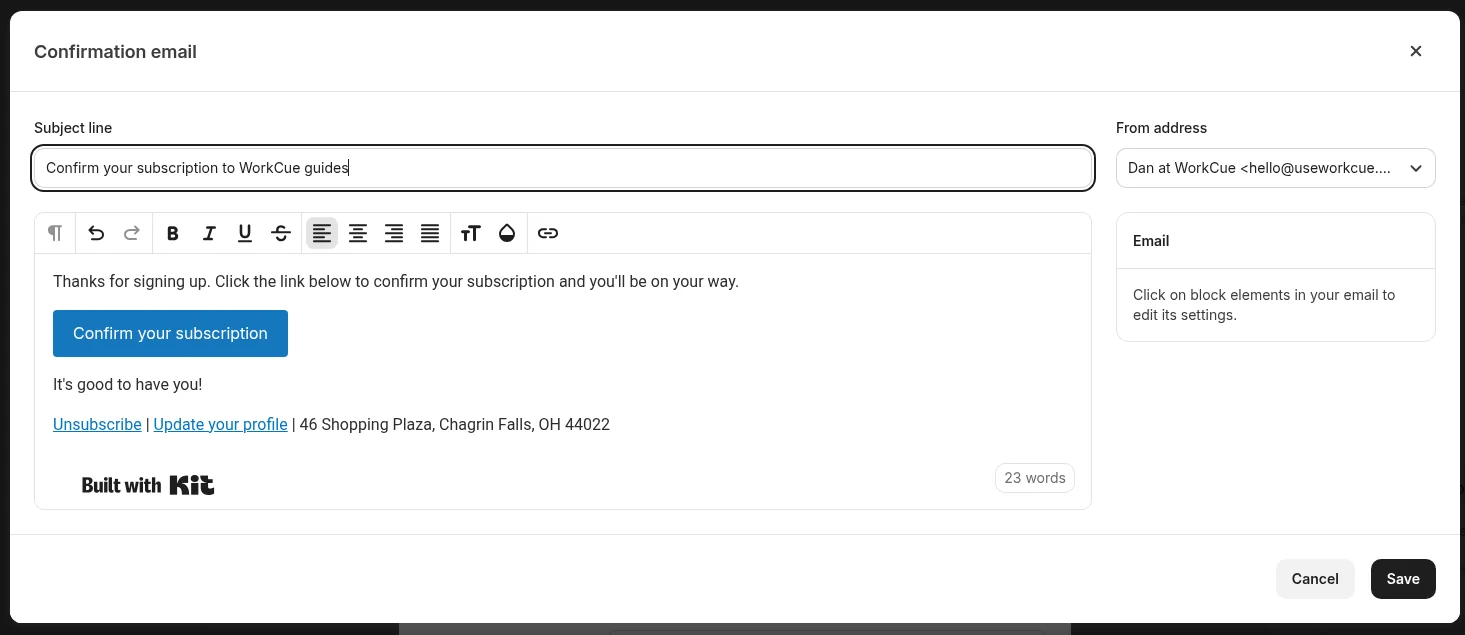
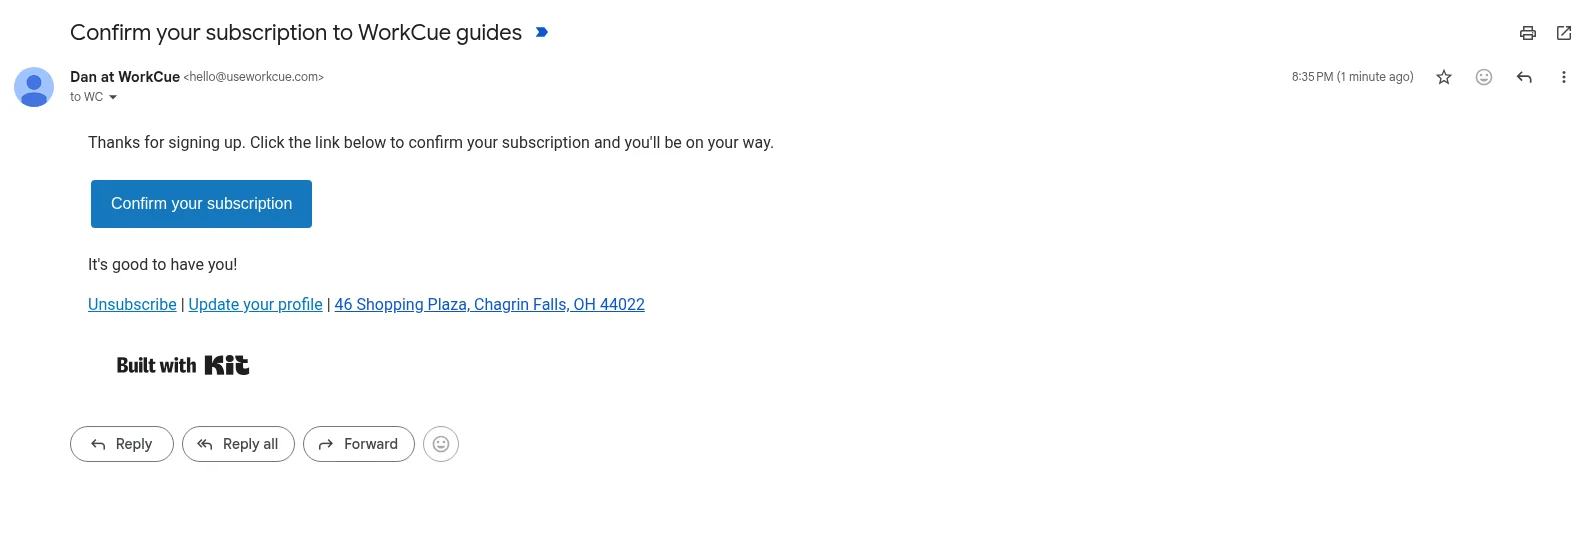
The default subject is "Important: confirm your subscription". The body reads "Thanks for signing up. Click the link below to confirm your subscription and you'll be on your way.", then a Confirm your subscription button and "It's good to have you!". The footer has Unsubscribe, Update your profile, your mailing address and a "Built with Kit" badge, which stays on the free plan.
Change the subject so people recognise it in their inbox, and check that the From address is the sender you want. On the WorkCue form we made two changes and kept Kit's default body (23 words):
- Subject line:
Confirm your subscription to WorkCue guides - From address:
Dan at WorkCue <hello@useworkcue.com>
The footer filled itself in from our settings: Unsubscribe, Update your profile and our business address, 46 Shopping Plaza, Chagrin Falls, OH 44022, then the "Built with Kit" badge.
Step 9: Publish and pick an embed option
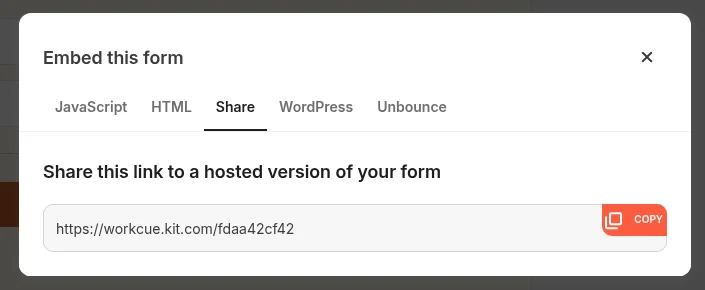
Click Save & Publish, then Embed. The "Embed this form" dialog has five tabs, the same on our first run and on the WorkCue form: JavaScript, HTML, Share, WordPress and Unbounce. JavaScript is a one-line script tag for any site, HTML gives you markup to paste, and Share gives you a hosted form page on your Kit subdomain, so you can link to the form without a website. Ours is https://workcue.kit.com/fdaa42cf42.
Step 10: Send a test subscriber through
Open the hosted URL in a private window and sign up with a test address on your own inbox. We use a labelled plus-address on our own Gmail (+wc-test02, first name "WC Test 02"), so the confirmation email lands somewhere we can see it and the row is easy to leave out of any numbers.
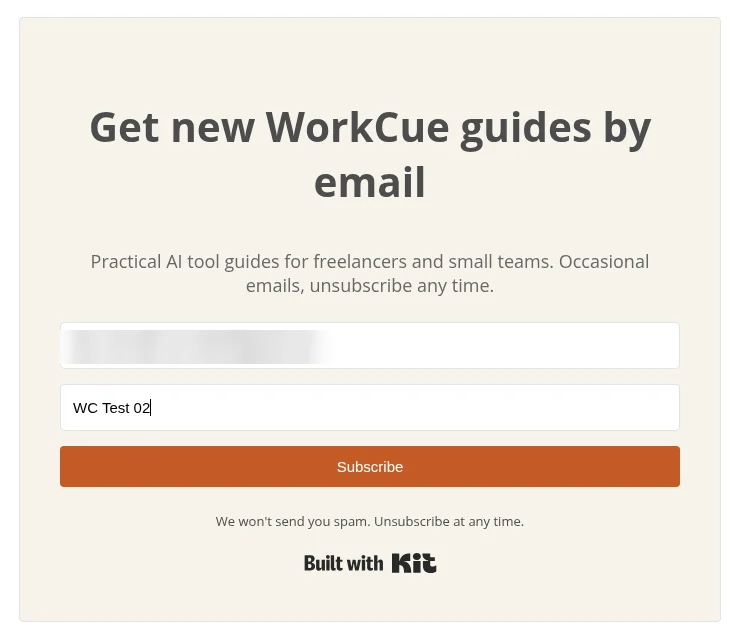
Click Subscribe. The form is replaced by the success message from Step 8.
Signing up twice. In our first run on this account, we submitted the same form again with an address that was still unconfirmed. This time a reCAPTCHA checkbox appeared first. After that the form showed the same success message, with no "already subscribed" notice, and Kit didn't create a second row.
Step 11: Find the subscriber (gotcha 3)
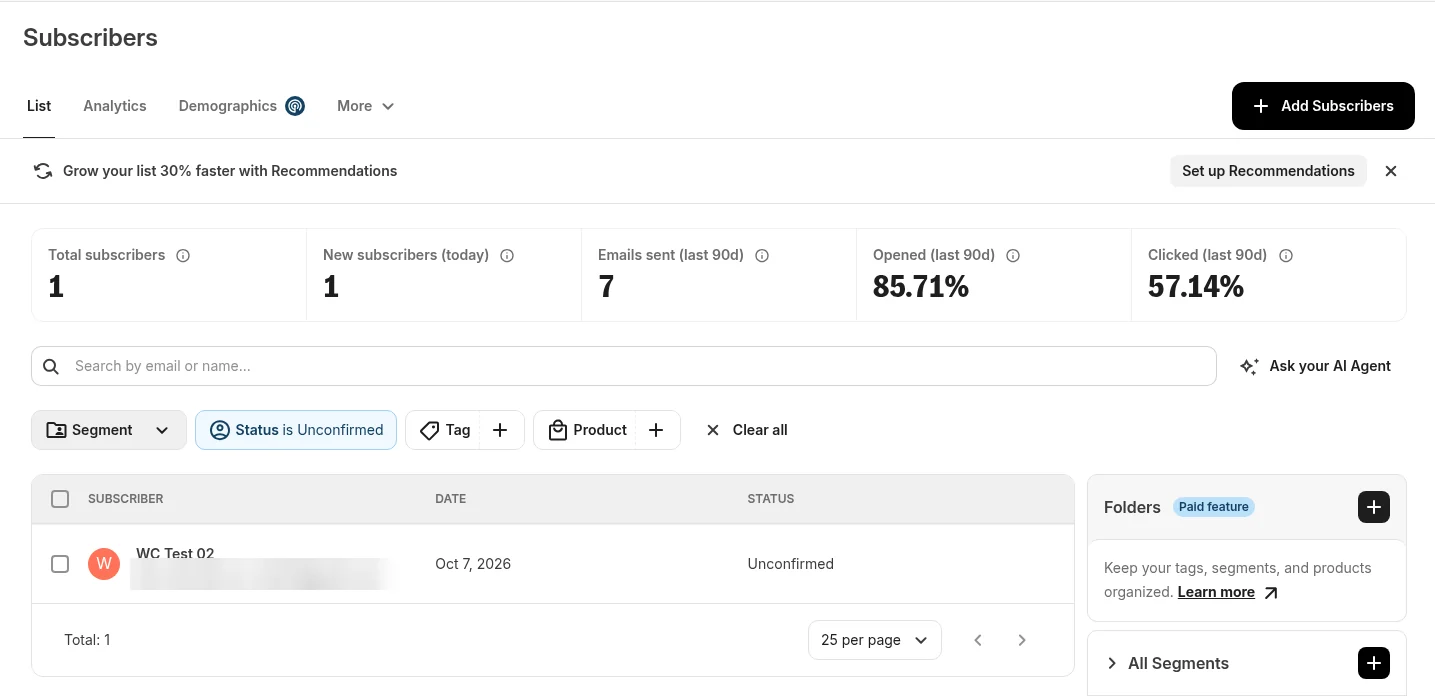
Open Subscribers. The list opens filtered to Status is Confirmed, so a new signup who hasn't clicked the confirmation link yet doesn't appear, and the Total subscribers count doesn't go up. On our first run it still said 0. It looks like the form is broken. It isn't. Change the status filter to Unconfirmed and the test subscriber is there.
On the WorkCue form, the new row took about 20 seconds and a page reload to appear as Unconfirmed. The Total subscribers box read 1, which was an earlier test address of ours that was already confirmed, not the new signup.
Step 12: Check where the confirmation email lands (gotcha 4)
This is the step that made us change our setup. While the account email and the sender address were unconfirmed, no confirmation email arrived at all. Once both were confirmed, the next signup's email took about 4 minutes, and it landed in Gmail's Spam folder, not the inbox. That wasn't a one-off: in those first runs every Kit email we sent from our free Gmail sender went to Spam. That included confirmation emails, a lead magnet delivery email and a test broadcast.
Gmail showed the sender with "via n.convertkit.com" after it and put its own note at the top: "Why is this message in spam? This message is similar to messages that were identified as spam in the past." That note is all Gmail told us, so we won't guess at its reasons.
The fix we used: send from an address on a domain you own, not a Gmail or other free address, and verify that domain in Kit under Settings > Email > Verified sending domains. The setup buttons are available on the free plan. We did it for useworkcue.com with Cloudflare's free DNS and Email Routing. After the change, our next test email landed in the Gmail Inbox with SPF, DKIM and DMARC all passing. That's one test, not a guarantee, and the verified sending domain guide shows the before, the records and the after. Until you've done it, it's worth adding "check your Spam folder" to your success message.
Here's the WorkCue form's confirmation email to our +wc-test02 address. We have no screenshot of the old Spam results, because that sender is gone, so that part of the story stays text only. With the new sender, the email arrived in the Inbox:

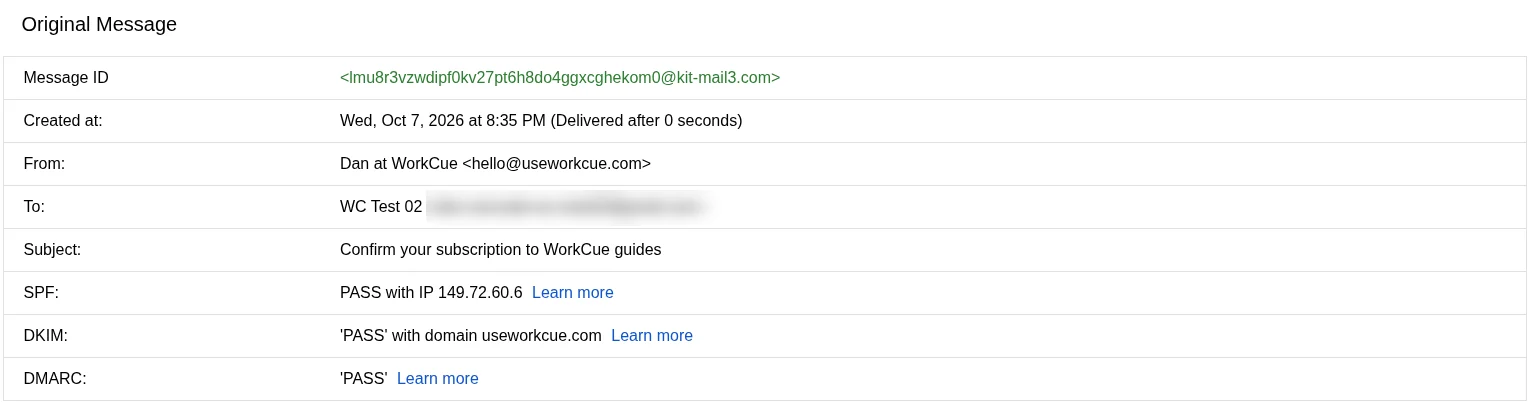
Gmail's Show original summary for that email: SPF PASS with IP 149.72.60.6, DKIM 'PASS' with domain useworkcue.com, and DMARC 'PASS'. Gmail listed it as created Wed, Oct 7, 2026 at 8:35 PM, "Delivered after 0 seconds".
Step 13: Click confirm and check the Confirmed rows
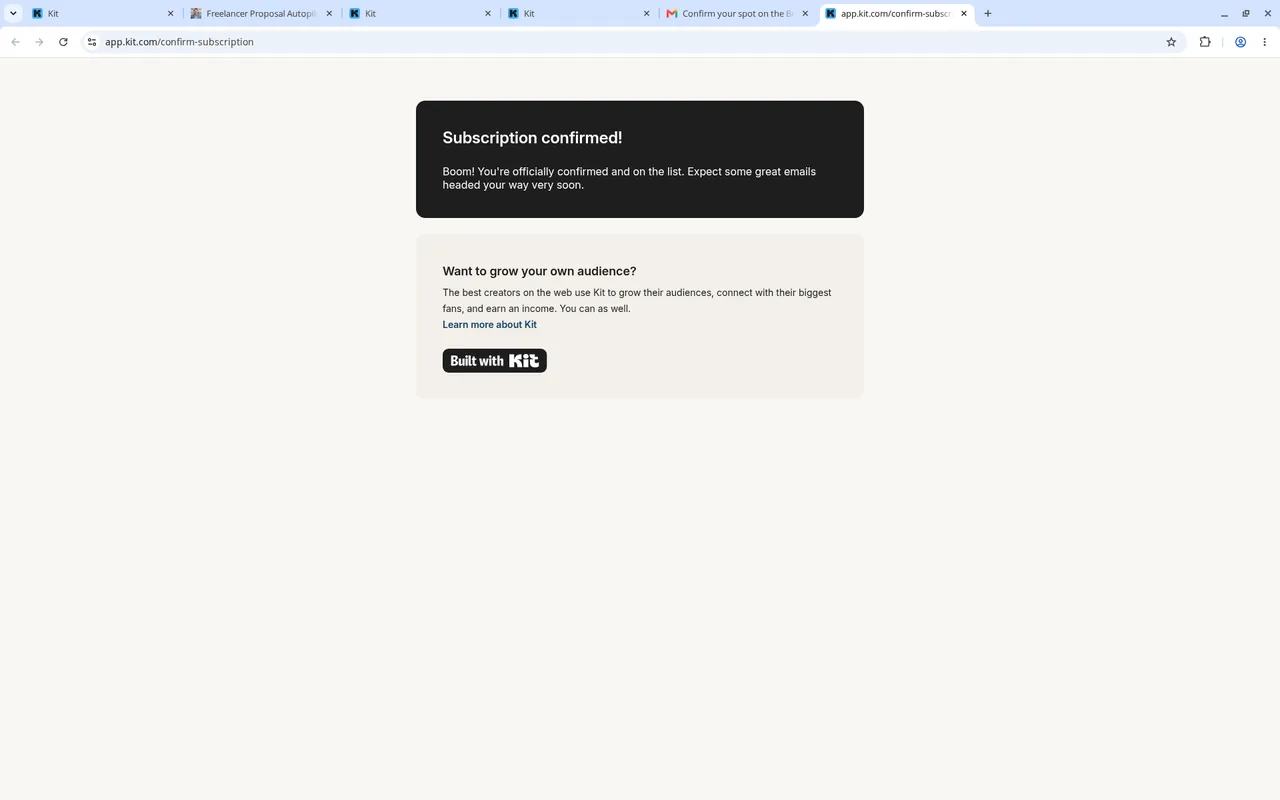
Click Confirm your subscription. The link opened Kit's default confirmation page at app.kit.com/confirm-subscription: "Subscription confirmed! Boom! You're officially confirmed and on the list…", with a "Want to grow your own audience?" box promoting Kit underneath. To send people somewhere else, change where the form sends subscribers after confirming, on its Confirmation email tab.
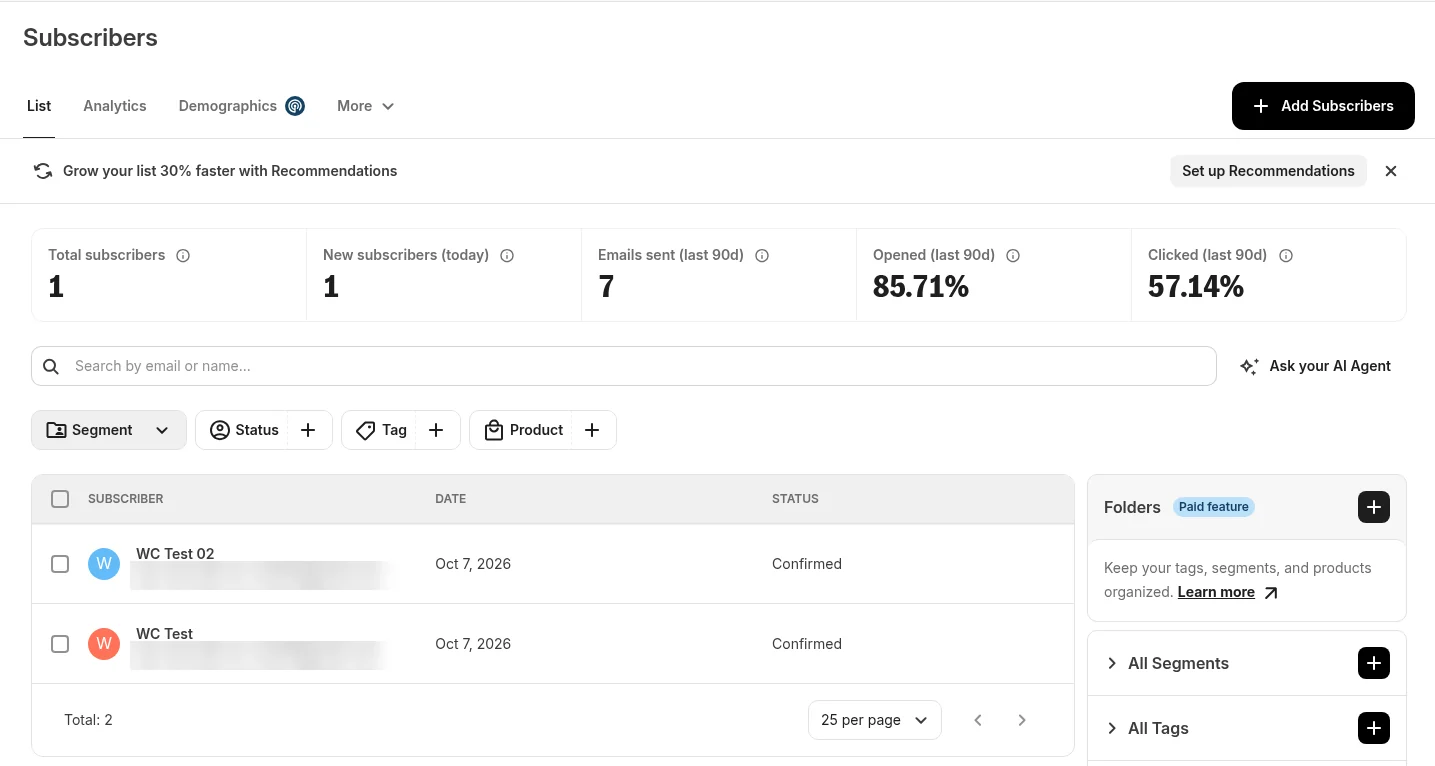
Back in Subscribers, the test row now shows as Confirmed. Two things surprised us in our first run. The list still opens on the Status is Confirmed filter, so unconfirmed people stay hidden until you clear it. And the Total subscribers box still read 0 right after confirming, and later lagged behind the number of Confirmed rows. So don't use that box to check whether your test worked: look at the rows.
It happened again on the WorkCue form. After we confirmed +wc-test02, our 8:37 PM PT capture on October 7, 2026 showed both of our test rows as Confirmed with Total: 2 at the bottom, while the Total subscribers box above still showed 1. Both rows are our own labelled test addresses, so the real subscriber count from this form so far is 0.
What the free plan did not get in the way of
For a single newsletter form, nothing on Free stopped us: forms, the hosted form page, double opt-in, custom fields and a verified sending domain all worked, and the pricing page lists tagging and segmentation on Free too. The limits we saw were a custom click tracking domain (Pro), "Built with Kit" branding on forms and emails, and the single automation. That last one shapes the next guides: we're saving it for a welcome email, so the lead magnet guide delivers its PDF through the confirmation email instead.
Recap
- Confirm the account email before anything else, then click Kit's separate sender verification email. The From name and subscriber confirmations depend on both.
- From our free Gmail sender, every Kit email in our first runs landed in Gmail's Spam folder. We moved to
hello@useworkcue.comon a verified domain, on the free plan. See the verified sending domain guide. - Kit fills in its own Seattle address for the anti-spam footer. Replace it with a business address or PO box (ours is in Chagrin Falls, OH), never your home.
- Recommendations is on by default. If you turn it off, check the button label in Settings, not the modal.
- New signups land as Unconfirmed, and the Subscribers list hides them by default. After confirming, check the rows, not the Total subscribers box.
Next in the series: deliver a PDF lead magnet with a Kit landing page, then verify your sending domain. The full list of guides is on the Sell What You Know hub.
Related guides
Deliver a PDF lead magnet with a Kit landing page on the free plan
We built the Kit landing page that delivers WorkCue's free 40-point scope checklist, on Kit's free plan: the Beacon template, double opt-in that starts the download, the confirmation email, publishing and an end-to-end test that landed in the Gmail Inbox.
Kit emails in Spam? Verify your sending domain (SPF, DKIM, DMARC)
We moved our Kit sender off a Gmail address and verified useworkcue.com on Kit's free plan, with Cloudflare's free DNS and Email Routing. Every record we added, what needs Kit Pro, and the before and after from one real Gmail test.
Create a free course on the Systeme.io free plan, with auto-enrolment
We built a real free 5-lesson mini-course on Systeme.io's Free plan, with an opt-in page that enrols people automatically and tags them. Every screen, the plan limits it used up, the login email our test signup got, and the gotchas we hit.