Kit emails in Spam? Verify your sending domain (SPF, DKIM, DMARC)
We moved our Kit sender off a Gmail address and verified useworkcue.com on Kit's free plan, with Cloudflare's free DNS and Email Routing. Every record we added, what needs Kit Pro, and the before and after from one real Gmail test.
Every Kit email we sent in our earlier test runs landed in Gmail's Spam folder. That was confirmation emails, a lead magnet delivery email and a test broadcast. All of them went out from a free Gmail address, and Kit had been telling us so the whole time.
This guide is the fix we ran on WorkCue, our own business, on October 7, 2026. We gave our domain, useworkcue.com, a real inbox, verified it as a sending domain in Kit, added a DMARC record and switched the sender to hello@useworkcue.com. All of it was done on Kit's free Newsletter plan and Cloudflare's free plan. After the change, our next test email landed in the Gmail Inbox with SPF, DKIM and DMARC all passing.
That is one test, to one Gmail inbox. It is not a guarantee about your emails, and we explain why at the end. But every step and screen below is real, and the result is exactly what Gmail showed us.
We're not in Kit's or Cloudflare's affiliate programs, so the links to them in this guide are plain links. WorkCue earns nothing from them.
What SPF, DKIM and DMARC do (short version)
You don't need to understand these deeply to set them up, but it helps to know what each record proves.
- SPF lists which servers are allowed to send mail for a domain. The receiving server checks the sending server's IP address against that list.
- DKIM adds a signature to each email. The receiving server looks up a public key in your DNS and checks that the message was signed by that domain and not changed on the way.
- DMARC tells receivers what to do when a message claiming to be from your domain fails those checks, and where to send reports. It only passes when SPF or DKIM passes for a domain that matches the From address.
When you send from a Gmail address through Kit, the From address says gmail.com but the email is sent by Kit's servers, not Google's. Gmail can see that it didn't come from Google. Sending from your own domain, with records that say Kit is allowed to send for it, fixes that mismatch.
Before: what we started with
Kit's Settings > Email page showed one sender, our Gmail address, with a yellow warning under it that it was "a free address" and "may negatively impact your deliverability."
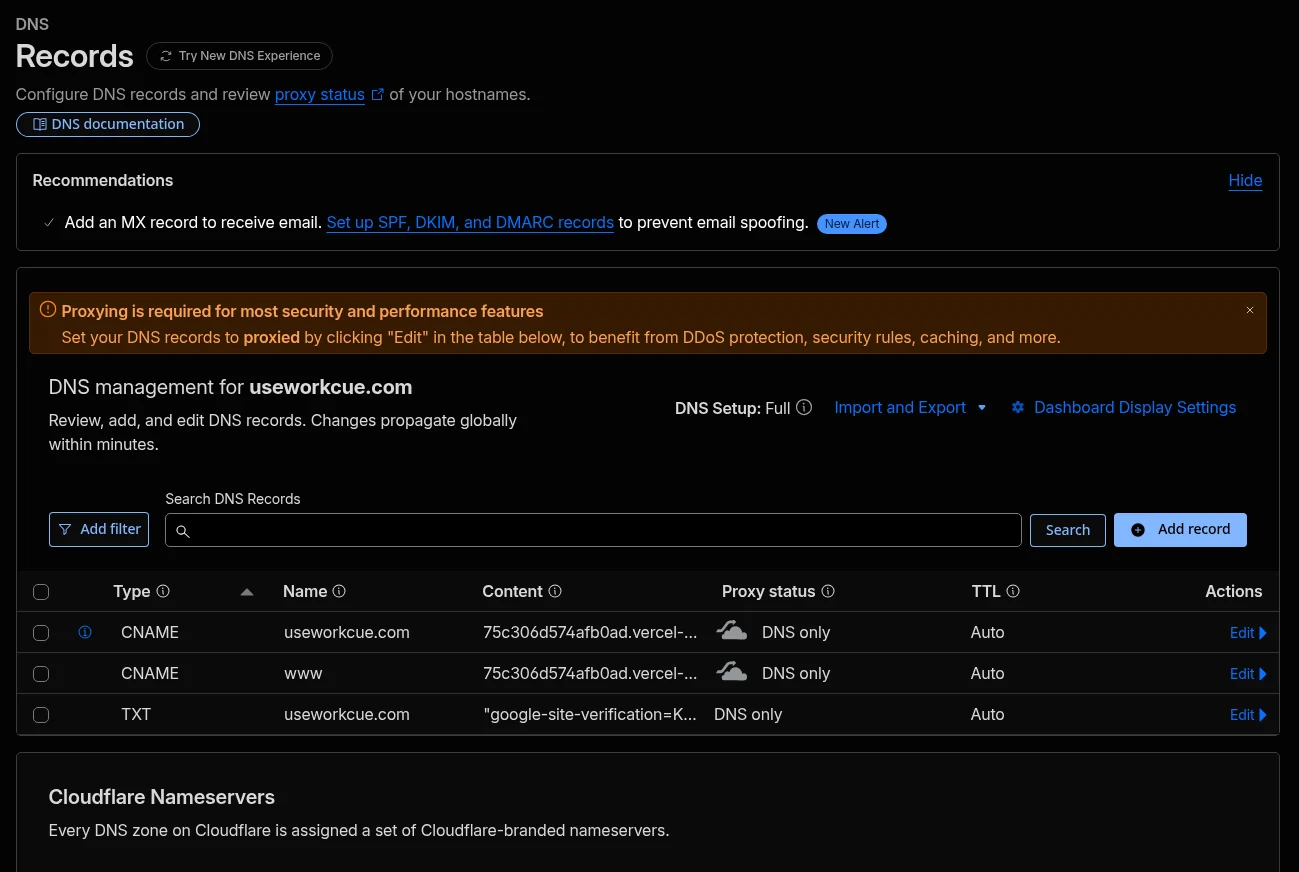
In Cloudflare, the DNS records for useworkcue.com were the two records that point the website at Vercel and a Google site verification TXT record. There was nothing for email. Cloudflare said so too, in a Recommendations box at the top: "Add an MX record to receive email. Set up SPF, DKIM, and DMARC records to prevent email spoofing."
Step 1: Give your domain an inbox first (Cloudflare Email Routing)
Kit verifies a new sender address by emailing it a confirmation link. So before you can send from hello@yourdomain.com, that address has to receive mail. If your domain already has email (Google Workspace, Microsoft 365, Fastmail or similar), skip to Step 2.
We didn't have any, and we didn't want to pay for a mailbox just to receive a few emails. Cloudflare Email Routing is free and forwards mail sent to your domain to an inbox you already have.
- In Cloudflare, open your domain and go to Email > Email Routing.
- Add a destination address: the inbox you want the mail forwarded to.
- Create a routing rule: the custom address (ours is
hello@useworkcue.com) and the action "Send to an email" with your destination. - When Cloudflare says DNS records are missing, click Add missing records.
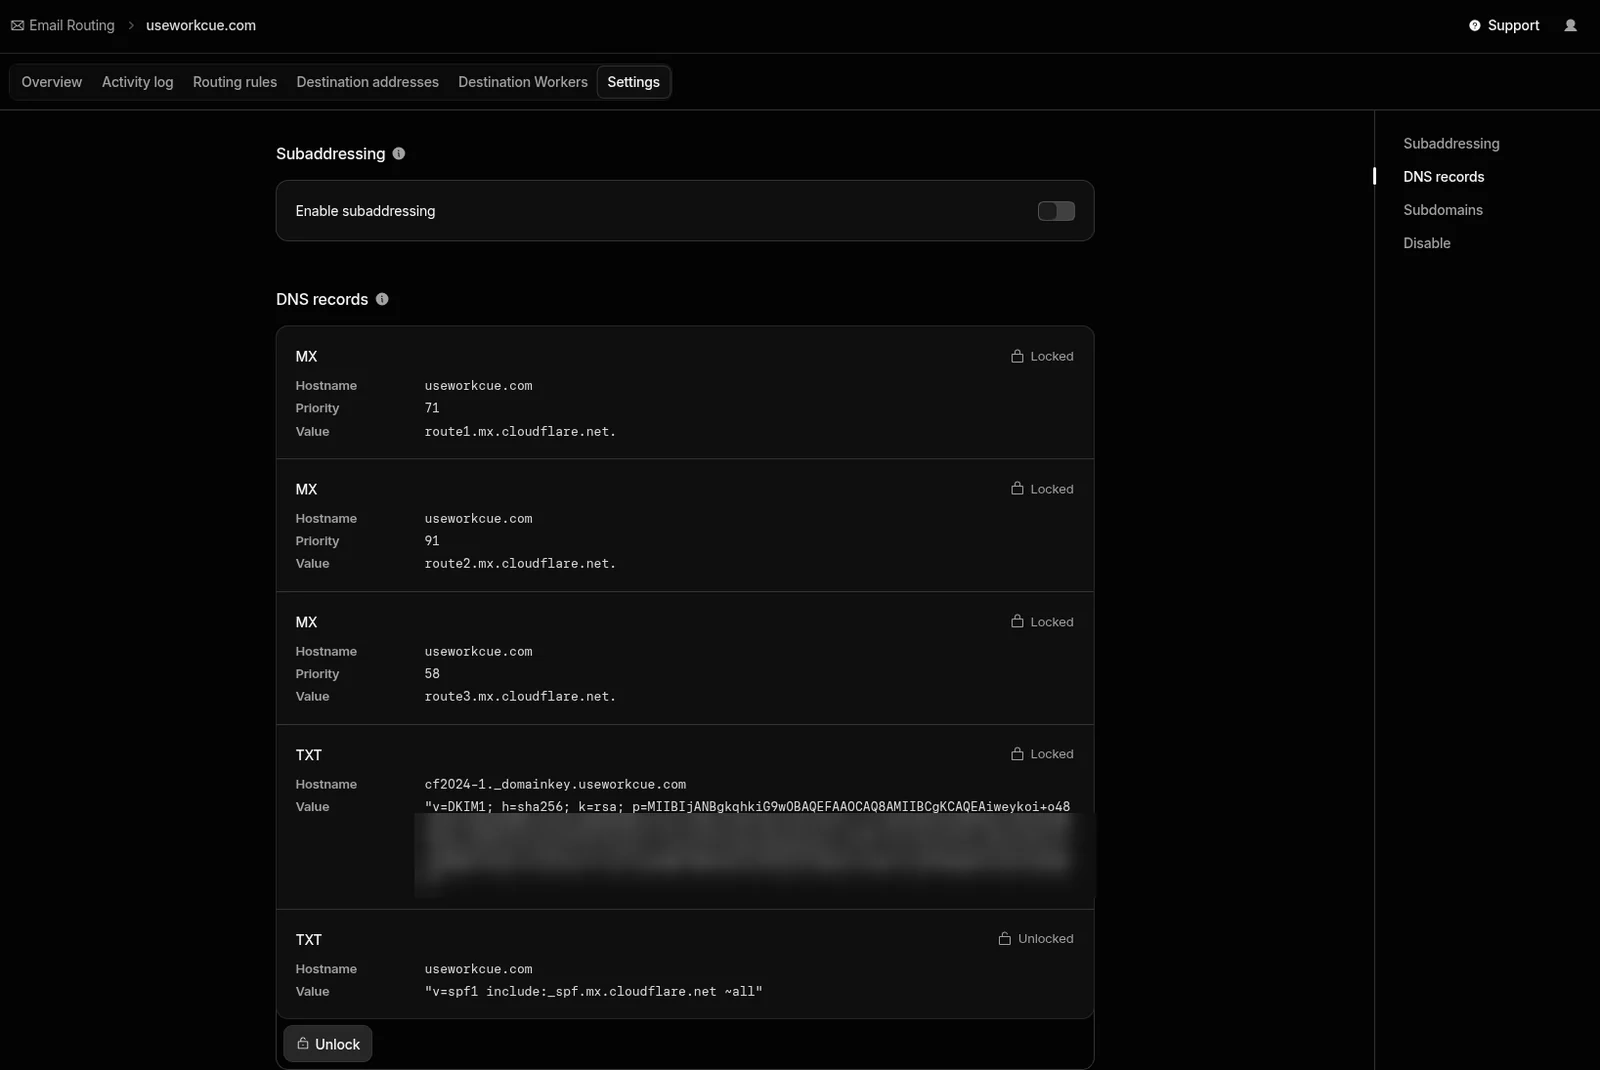
On our run, Add missing records added five records in one go:
| Type | Name | Value | Notes |
|---|---|---|---|
| MX | useworkcue.com | route1.mx.cloudflare.net | priority 71 |
| MX | useworkcue.com | route2.mx.cloudflare.net | priority 91 |
| MX | useworkcue.com | route3.mx.cloudflare.net | priority 58 |
| TXT | cf2024-1._domainkey | v=DKIM1; h=sha256; k=rsa; p=... | Cloudflare's DKIM key |
| TXT | useworkcue.com | v=spf1 include:_spf.mx.cloudflare.net ~all | SPF |
Cloudflare marks the three MX records and the DKIM record as Locked. The SPF record is Unlocked, so you can edit it later if you need to (see the troubleshooting section on two SPF records).
Our destination address showed Verified straight away, because that Gmail address was already verified on our Cloudflare account. On a fresh account you will usually get a verification email from Cloudflare first, and the routing rule won't forward anything until you click the link in it.
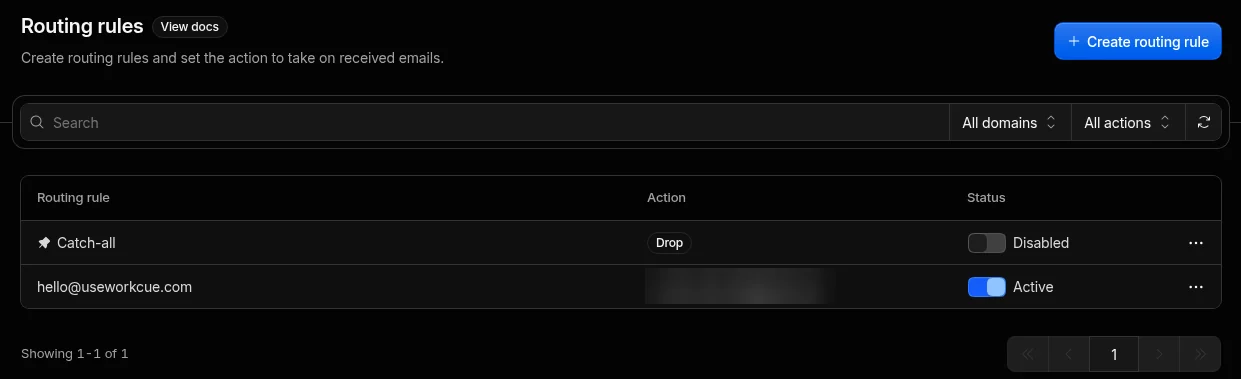
The finished rule looked like this. The catch-all rule stays Disabled with the action Drop, so mail to any other address at the domain is not forwarded.
Step 2: Start the verified sending domain in Kit
In Kit, go to Settings > Email and scroll to Verified sending domains.
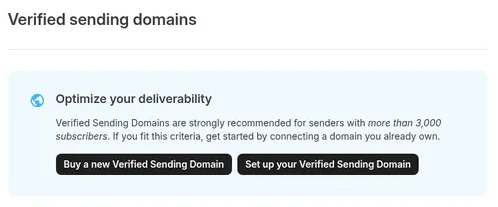
Before we set anything up, this section had a panel headed "Optimize your deliverability". Kit says verified sending domains are "strongly recommended for senders with more than 3,000 subscribers". We had nowhere near 3,000. We set it up anyway, because our emails were going to Spam at the size we were. The panel had two buttons, Buy a new Verified Sending Domain and Set up your Verified Sending Domain. We already own useworkcue.com, so we clicked Set up your Verified Sending Domain and entered useworkcue.com. We didn't buy anything.
Kit then showed the records to add, in a dialog called Verify your sending domain:
| Type | Name | Value |
|---|---|---|
| CNAME | ckespa | spf.dm-<your id>.sg1.convertkit.com |
| CNAME | cka._domainkey | dkim.dm-<your id>.sg1.convertkit.com |
| CNAME | cka2._domainkey | dkim2.dm-<your id>.sg1.convertkit.com |
| TXT | _dmarc | v=DMARC1; p=none; |
The dm-... part is specific to your Kit account, so copy the values from your own Kit screen, not from this table. Clicking any field in Kit's table copies it.
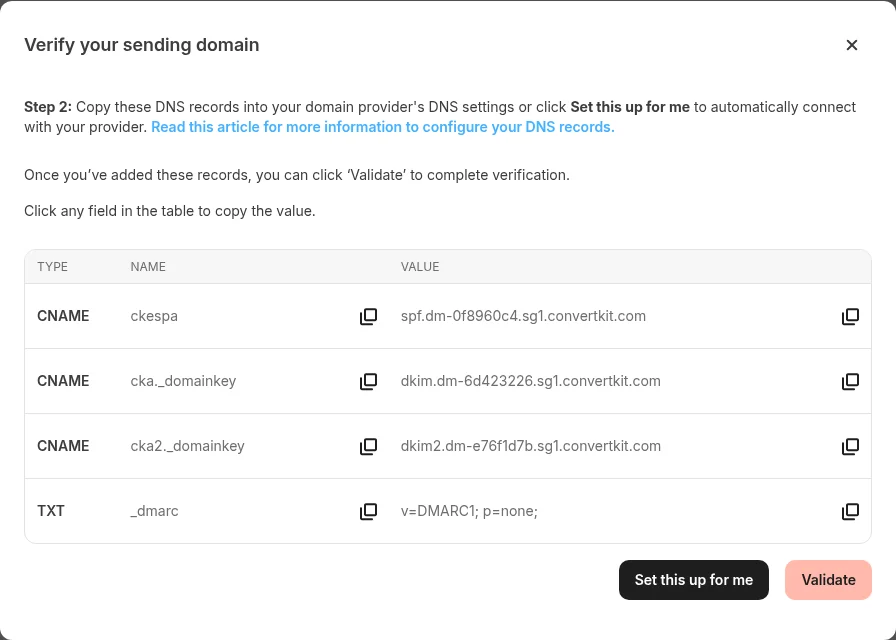
The dialog also has a Set this up for me button that, in Kit's words, will "automatically connect with your provider." We didn't use it. We added the records by hand so we could show each one and so no third party needed access to our DNS. Leave the Kit tab open; you'll come back to click Validate.
Step 3: Add Kit's records in Cloudflare (DNS only)
In Cloudflare, go to DNS > Records > Add record and add each of Kit's records:
- Type CNAME, Name
ckespa, Target thespf.dm-...value from Kit. - Type CNAME, Name
cka._domainkey, Target thedkim.dm-...value. - Type CNAME, Name
cka2._domainkey, Target thedkim2.dm-...value. - Type TXT, Name
_dmarc, Content your DMARC value (see below).
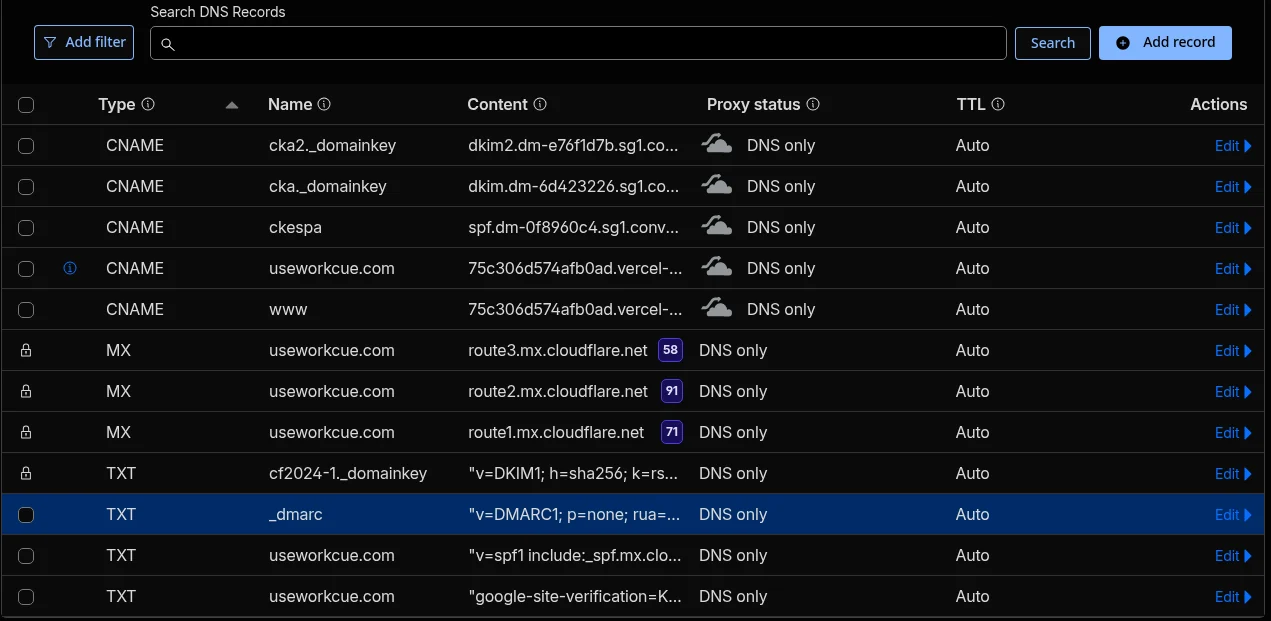
For all three CNAMEs, set Proxy status to DNS only (the grey cloud) before you save. Proxied (the orange cloud) is meant for website traffic. With it on, Cloudflare answers with its own addresses instead of Kit's targets, and Kit can't verify the records.
Type the short name (ckespa), not the full ckespa.useworkcue.com. Cloudflare adds your domain to the name for you.
DMARC value. Kit suggested v=DMARC1; p=none;. We used v=DMARC1; p=none; rua=mailto:hello@useworkcue.com. p=none is monitor-only: you ask receivers not to block or quarantine mail that fails, just to report on it. The rua part says where to send aggregate reports. Reports that do arrive are usually zipped XML files, and ours go to the same forwarded inbox. Starting at p=none is the safe choice while you check that all your real email (Kit, your normal mailbox, anything else that sends as your domain) passes. Only add one _dmarc record. If you already have one, edit it.
No second SPF record. Kit's records include no SPF TXT for the root of your domain. Kit's SPF works through the ckespa CNAME: Kit sends with a bounce address at ckespa.useworkcue.com, and SPF is checked against that name, which points at Kit. So we left Cloudflare's SPF record alone, and useworkcue.com still has exactly one v=spf1 record.
Here's the DNS list after everything was added. You can see the three Kit CNAMEs (DNS only), the three MX records, Cloudflare's DKIM record, the new _dmarc record, the single SPF record and the original site records, unchanged.
Step 4: Validate in Kit
Back in Kit's dialog, click Validate. Ours showed "Domain validation successful!" on the first click. Click Finish.
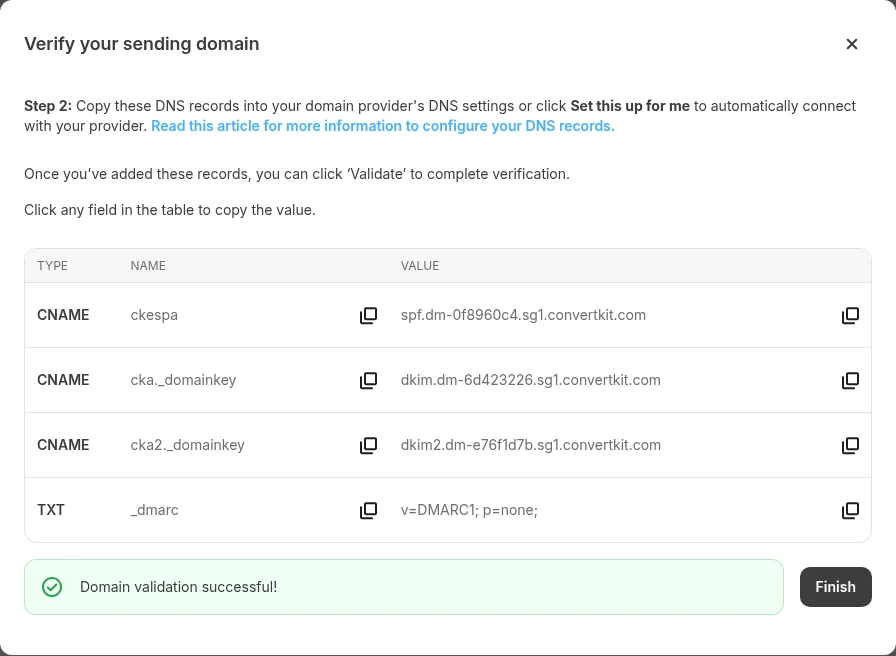
If yours fails, don't change the records straight away. See the troubleshooting section below; the usual causes are a proxied CNAME, a doubled name or DNS that hasn't updated yet.
On the same settings page, the Click Tracking Domain section offers "Use a custom click tracking domain", but on the free plan the only button is Upgrade to Pro to set up a click tracking domain. Kit adds that the domain "must start with click." We left it.
Step 5: Add and confirm the new sender
Still in Settings > Email, under Email addresses, click Add from address. We entered:
- From name: Dan at WorkCue
- Email address:
hello@useworkcue.com
The new row showed as pending, with a Resend Confirmation link. Kit had sent a confirmation email to hello@useworkcue.com, and Cloudflare Email Routing forwarded it to our Gmail inbox. After we clicked the link, Kit showed "Email address has been confirmed."
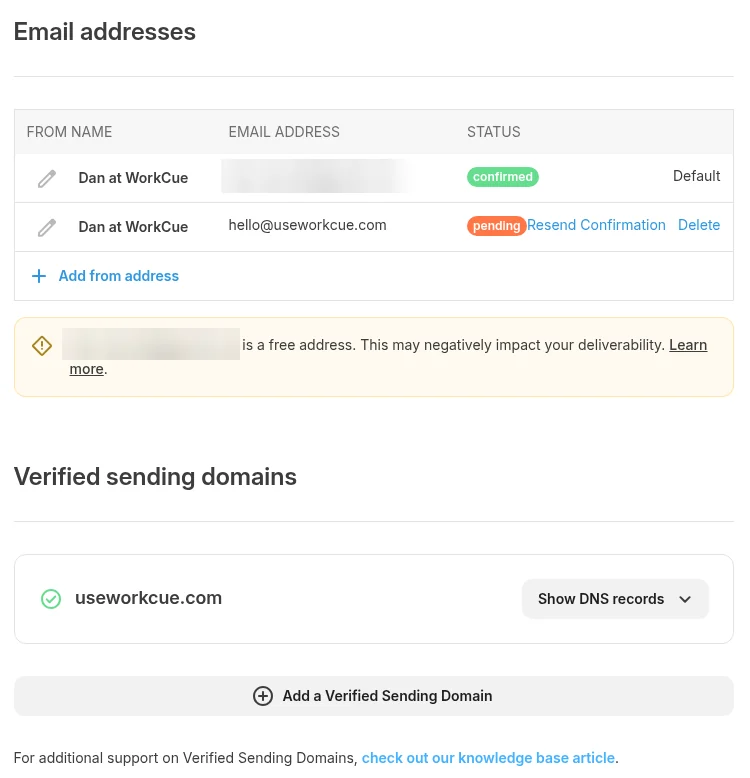
Then make it the default sender, so new forms, landing pages and broadcasts use it. Ours now shows hello@useworkcue.com as confirmed and Default.
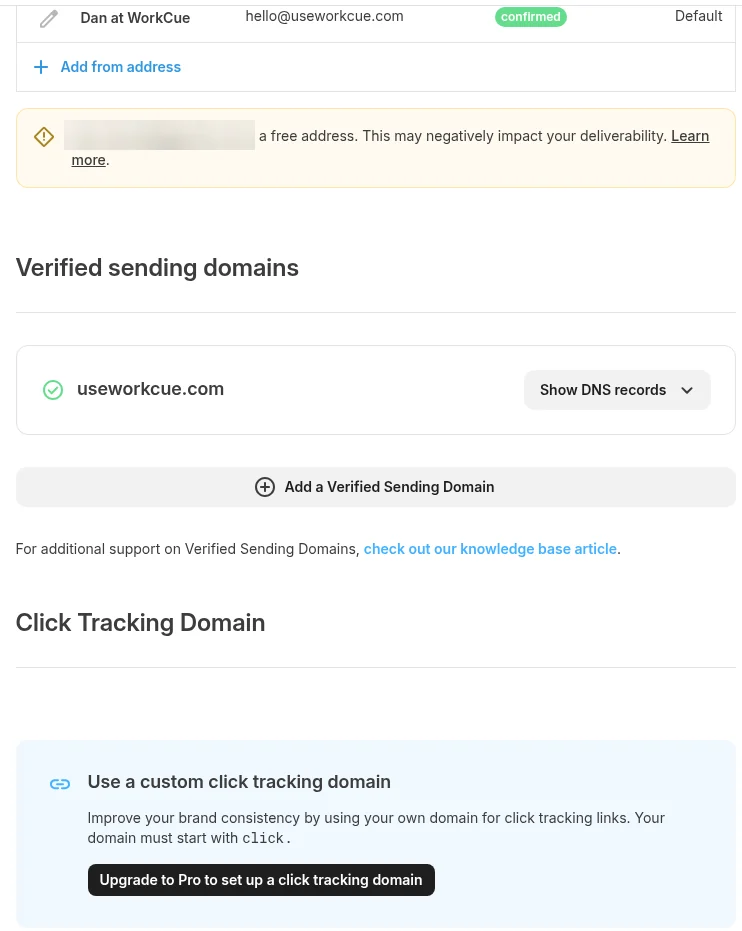
The yellow "free address" warning about the Gmail address was still on the page after the switch, because that address is still in the list. We haven't removed it. If you still have forms or sequences set up before the switch, check which sender each one uses.
After: the same test, one real result
We signed up on our live landing page with our own labelled test address (a +wc-test01 Gmail alias), the same way a reader would. The page is real: it's how our free 40-point freelance scope checklist is delivered.
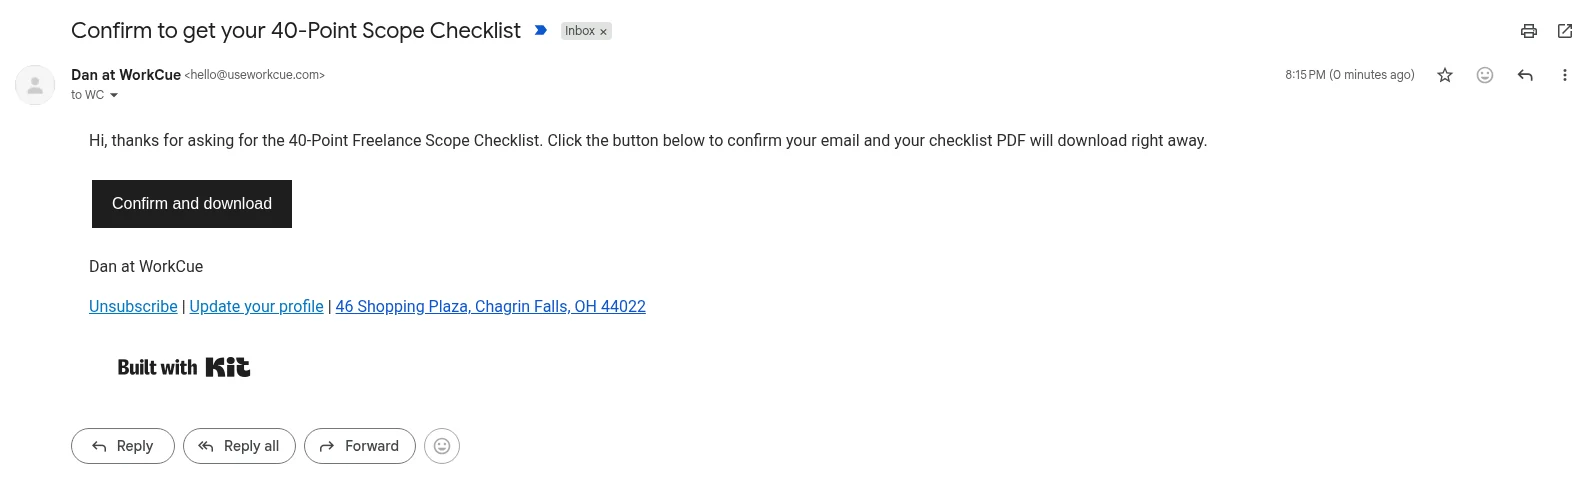
The confirmation email arrived in the Gmail Inbox, not Spam.

The sender line read Dan at WorkCue <hello@useworkcue.com>, with no "via n.convertkit.com" next to it this time. The footer carries our business address and Kit's "Built with Kit" badge, which stays on the free plan.
In Gmail, the three-dot menu > Show original shows the authentication results at the top:
- SPF: PASS with IP 149.72.193.89
- DKIM: 'PASS' with domain useworkcue.com
- DMARC: 'PASS'
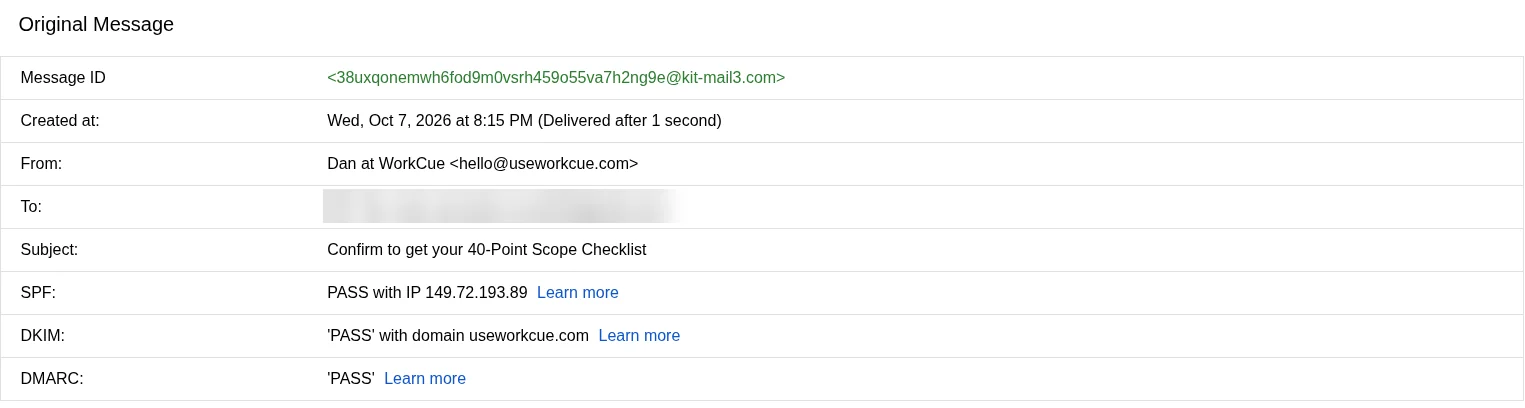
The full headers below that summary match the setup. The bounce address was at ckespa.useworkcue.com, which is where SPF passed. The DKIM signature that passed for useworkcue.com used the selector cka, Kit's cka._domainkey record. A second DKIM signature, from sendgrid.info, also passed. DMARC only needs one pass on a domain that matches the From address, and the useworkcue.com signature is that one.
What this does and doesn't show. It's one email, to one Gmail inbox, sent the same evening as the change. Authentication proves the email really came from us. It doesn't make a mailbox provider trust a brand new sending domain, and it doesn't stop a provider filtering an email for its content or because few people open or reply to it. Outlook, Yahoo and company mail filters may treat the same email differently. If you run this and your emails still go to Spam, the records can still be right. Keep sending to people who asked for your emails, and check again after a few sends.
Troubleshooting
Kit says validation failed and the CNAMEs show an orange cloud. They're proxied. In Cloudflare, click Edit on each Kit CNAME, switch Proxy status to DNS only and save, then click Validate in Kit again.
You now have two SPF records. A domain should have only one v=spf1 TXT record per name. With two, SPF checks can fail outright. This can happen if you add an SPF record for a new tool while Email Routing's record (or your mailbox provider's) is already there. Merge them into one record with every include: in it, for example v=spf1 include:_spf.mx.cloudflare.net include:_spf.google.com ~all if you also send from Google Workspace. For Kit you don't need a root SPF include at all, because its SPF works through the ckespa CNAME. In Cloudflare, the Email Routing SPF record is the unlocked one, so you can edit it.
The record name got doubled. Some DNS providers add your domain to whatever you type, so ckespa.useworkcue.com becomes ckespa.useworkcue.com.useworkcue.com. Enter only the part before your domain (ckespa, cka._domainkey, cka2._domainkey, _dmarc).
Validation fails right after you add the records. DNS changes can take a while to show up everywhere. Cloudflare's own DNS page says changes "propagate globally within minutes", and ours validated on the first try, but other DNS providers can be slower. Wait, then click Validate again. You can check what the world sees with a public DNS lookup tool, or dig CNAME ckespa.yourdomain.com in a terminal.
Kit's sender confirmation email never arrives. Check that the Email Routing rule is Active, the destination address is Verified, and the MX records are in your DNS list. Then look in the destination inbox's Spam folder and click Resend Confirmation in Kit.
You already had a DMARC record. Keep one _dmarc record. If yours already has p=quarantine or p=reject, think twice before relaxing it, and make sure Kit passes (Show original, as above) before you rely on it.
Using Systeme.io as well? It asks for its own records on the same domain: three CNAMEs and a DMARC record of its own. We added its CNAMEs next to Kit's and kept our single _dmarc record. When we published, Systeme.io still showed the domain as Pending, so we can't yet say the two work side by side. The details are in our Systeme.io mini-course guide, and we'll update both guides when it verifies.
Recap
- Sending from a free Gmail address, every Kit email in our earlier tests went to Spam. Kit warned us about the free address.
- We gave useworkcue.com an inbox with Cloudflare Email Routing (free), then added Kit's three CNAMEs (DNS only) and a
p=noneDMARC record. It validated first time on Kit's free plan, with one SPF record and no spend. Only the custom click tracking domain needs Kit Pro. - With
hello@useworkcue.comas the default sender, our one test email landed in the Gmail Inbox with SPF, DKIM and DMARC passing. That's one test, not a guarantee.
Want to see the result from the reader's side? Sign up on our free scope checklist page, the same Kit landing page we tested with.
Related guides
Set up Kit on the free plan: sender, first form and a test subscriber
How we set up WorkCue's real Kit account on the free plan: signup, onboarding, what the plan includes, the sender and mailing address, Recommendations, a first inline form and a test subscriber taken all the way to Confirmed, with the gotchas we hit.
Deliver a PDF lead magnet with a Kit landing page on the free plan
We built the Kit landing page that delivers WorkCue's free 40-point scope checklist, on Kit's free plan: the Beacon template, double opt-in that starts the download, the confirmation email, publishing and an end-to-end test that landed in the Gmail Inbox.
Create a free course on the Systeme.io free plan, with auto-enrolment
We built a real free 5-lesson mini-course on Systeme.io's Free plan, with an opt-in page that enrols people automatically and tags them. Every screen, the plan limits it used up, the login email our test signup got, and the gotchas we hit.