Sell a digital download on the Systeme.io free plan with Stripe
We set up a real $9 checkout for our Freelancer Proposal Autopilot Kit on Systeme.io's Free plan: Stripe connection, product and price plan, a trimmed order form and a download button on the thank-you page. What worked, what we had to work around, and what we could not test.
We sell one product: the Freelancer Proposal Autopilot Kit, a $9 download with AI prompts, a one-page proposal template, a 40-point scope checklist and a Make automation build. It's on Gumroad already (here). For this guide we built a second checkout for the same kit in Systeme.io on its Free plan, connected to Stripe, with the file delivered from the thank-you page.
The result is live: our Systeme.io order form. It shows the kit at $9.00 with card, Apple Pay and Klarna.
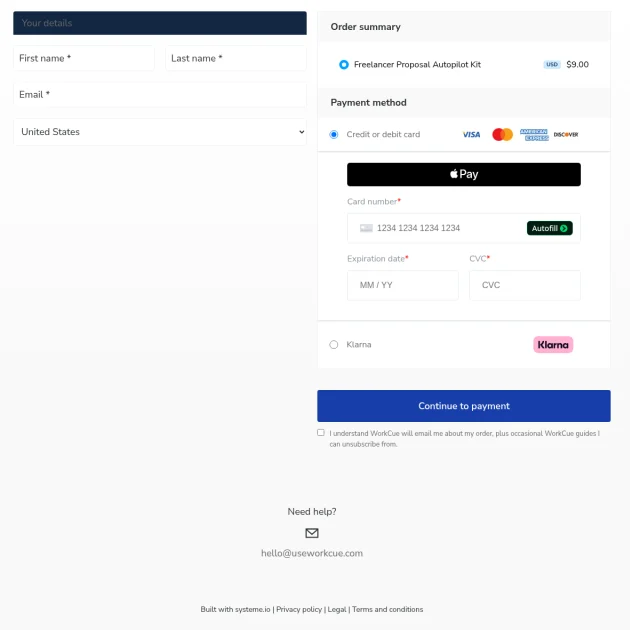
Here's the honest part up front. We have not placed an order on this page, and we can't tell you the payment works end to end. Systeme.io's help says "it is not possible to perform a test purchase via Stripe"; the only check it suggests is buying from yourself with real money and refunding it (source). We don't make real-money purchases in this series, so the charge, the redirect to the thank-you page and any receipt email are untested. As of October 7, 2026 the page has had no orders and $0 in sales.
Step 1: Connect Stripe before you build
On the Free plan you can create the funnel and the product without a payment gateway, but not a price. Under Price plans, Systeme.io shows: "To create payment pages, you need to connect to a payment gateway that is supported on systeme.io". So connect one first.

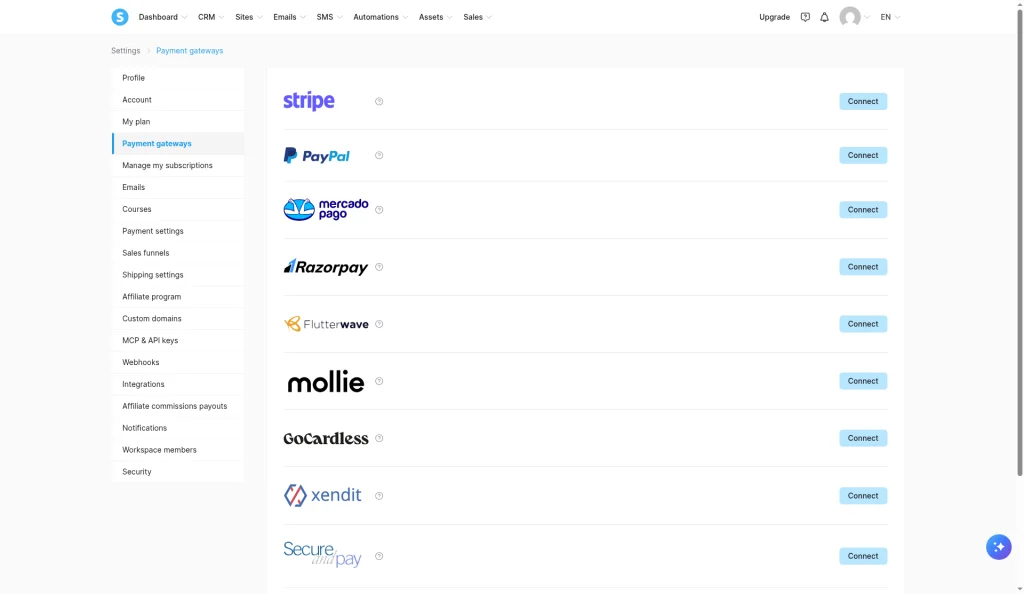
Click your avatar, then Settings > Payment gateways. The list on our account: Stripe, PayPal, Mercado Pago, Razorpay, Flutterwave, Mollie, GoCardless, Xendit, Secure & Pay, Cash on delivery and Square, each with a Connect button. There's no test or sandbox switch here.
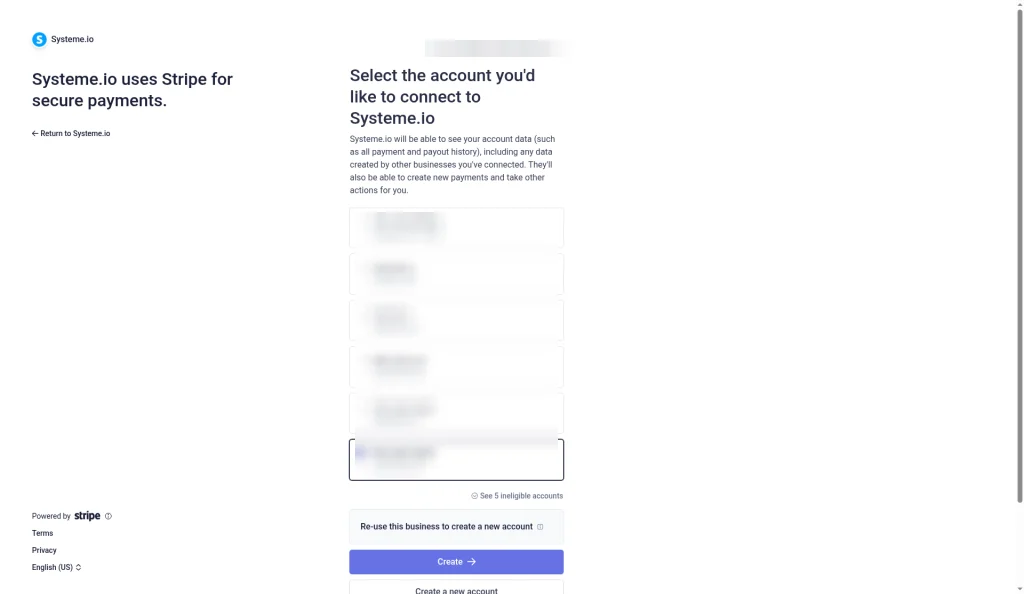
Click Connect next to Stripe. You're sent to Stripe, which says "Systeme.io uses Stripe for secure payments" and asks you to log in or create an account. If your Stripe login already has accounts, it asks you to pick one: "Select the account you'd like to connect to Systeme.io", with a warning that Systeme.io "will be able to see your account data (such as all payment and payout history)" and "create new payments". There's also Create a new account. We connected an existing live account.
Stripe's own account checks (who you are, where payouts go) happen on Stripe's side, and Systeme.io's help says they're "required to activate payments" (source). We don't show them here.
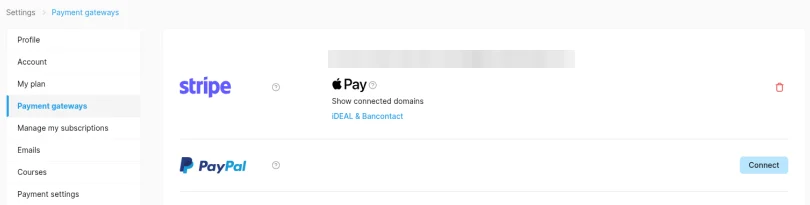
Back in Systeme.io, the Stripe row first said "The integration with the account is in progress", with the Stripe account's owner email and an iDEAL & Bancontact link.
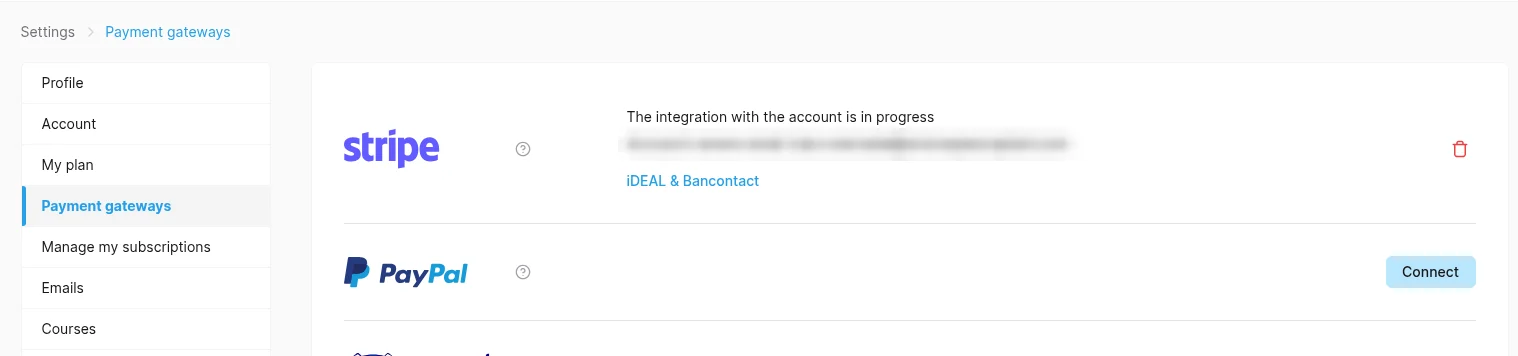
When we looked again later that evening, the row showed Apple Pay, "Show connected domains" and the iDEAL & Bancontact link. That's the state we built the checkout on.
One requirement from the same help page to keep in mind for Step 5: "For Stripe to work correctly, the Email and First Name fields are required on your payment pages."
Step 2: Create a Sell funnel
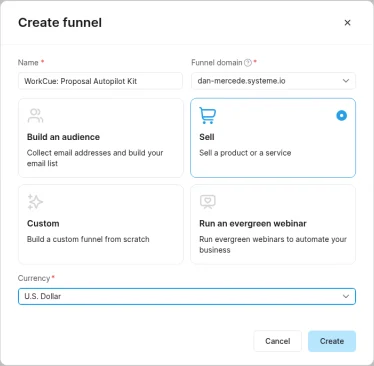
Go to Sites > Sales funnels > Create. In "Create funnel" we entered:
- Name:
WorkCue: Proposal Autopilot Kit - Funnel domain: our account subdomain (
dan-mercede.systeme.io) - Goal: Sell ("Sell a product or a service"). The others are Build an audience, Custom and Run an evergreen webinar
- Currency: U.S. Dollar. Check this one: in an earlier run on the same account, the dialog defaulted to Euro, and typing "US" didn't find the dollar (type "Dollar")
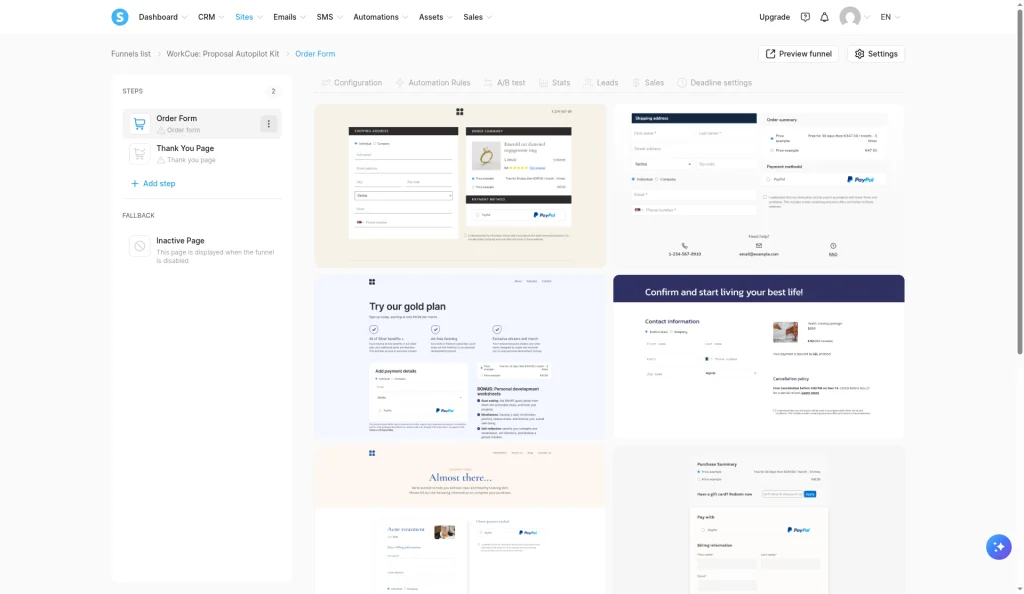
The Sell goal creates two steps, Order Form and Thank You Page, plus a fallback Inactive Page that shows when the funnel is disabled. There's no sales page step, and we didn't add one: the order form alone can take the payment. Each step asks for a template first.
The funnel counts toward Free's limit of 3. Ours is one of two funnels in the account.
Step 3: Pick the offer type and create the product
Open the Order Form step's Configuration tab. Under CHOOSE OFFER TYPE you pick Digital product ("Courses, courses bundles, tags, communities, events") or Physical product ("Goods you ship to the customer"). Until a product is attached, Systeme.io warns: "Without a digital or physical product attached, visitors won't be able to see this page."
We chose Digital product, then Create new product. It asks for a name only: Freelancer Proposal Autopilot Kit.
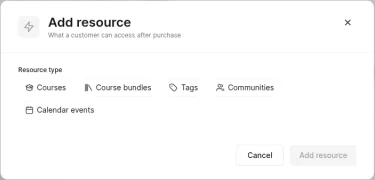
The product has two parts: Resources ("What a customer can access after purchase") and Price plans. The Add resource dialog offers Courses, Course bundles, Tags, Communities and Calendar events. There's no file option. A plain download is delivered another way (Step 6), so we added no resource.
On Free, a course or tag resource would use up the account's only course or only tag. We keep those for a free mini-course, which is another reason the kit is delivered by a download button.
Step 4: Add the $9 price plan
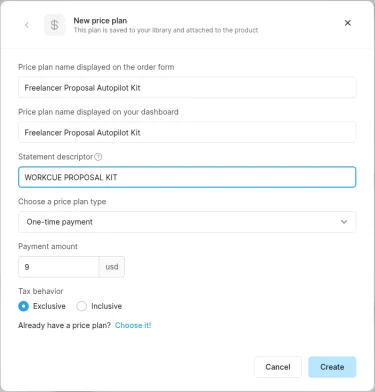
With Stripe connected, the price plan form opens. "New price plan" says: "This plan is saved to your library and attached to the product". The fields:
- Price plan name displayed on the order form:
Freelancer Proposal Autopilot Kit - Price plan name displayed on your dashboard:
Freelancer Proposal Autopilot Kit - Statement descriptor: what appears on the buyer's card statement. It's required, with a 22-character maximum, and Create stays disabled until you fill it in. We used
WORKCUE PROPOSAL KIT(20 characters) - Choose a price plan type: One-time payment, Subscription or Payment plan. We picked One-time payment
- Payment amount:
9. The currency (usd) comes from the funnel and can't be changed here - Tax behavior: Exclusive (the default) or Inclusive. We kept Exclusive and didn't set up any tax collection. Check your own tax obligations before you sell
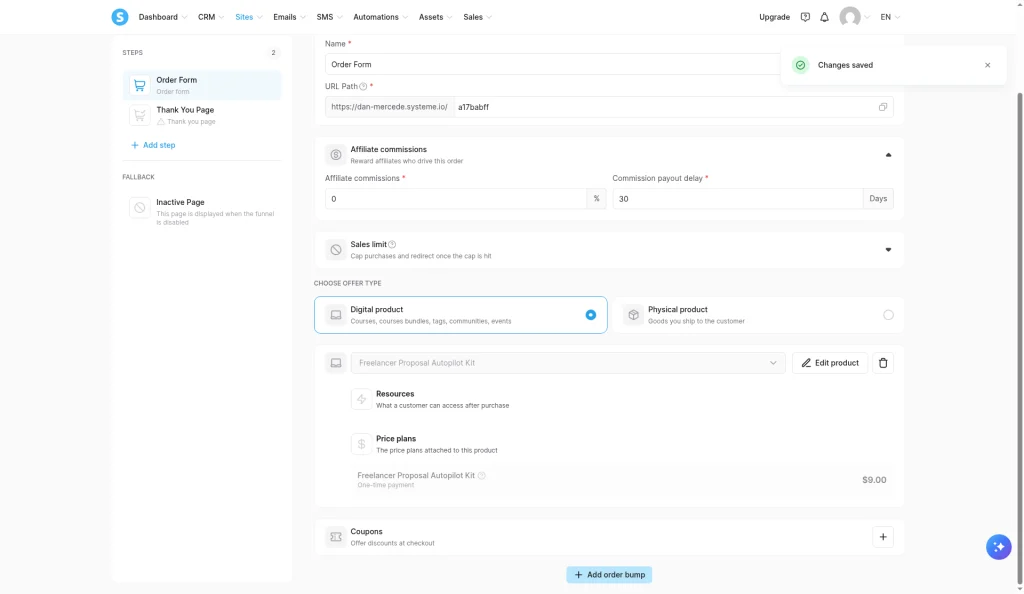
After saving, the step shows "Changes saved" and the plan under the product: "Freelancer Proposal Autopilot Kit, One-time payment, $9.00". Two defaults we left alone on the same screen: Affiliate commissions at 0% with a 30-day payout delay, and Sales limit. Coupons and Add order bump sit below; we didn't use either.
Step 5: Trim the order form template
Click Edit page. The template was built for physical goods. It asked for a Shipping address (first and last name, street address, country, zip code), an Individual / Company choice, Company name and Company Tax number (both required), Email and a required Phone number. The footer had placeholder contact details (1-234-567-8910 and email@example.com) and the checkbox under the pay button said: "I understand that my information will be used in accordance with these Terms and conditions. This includes emails containing exclusive offers and invites to future webinars."
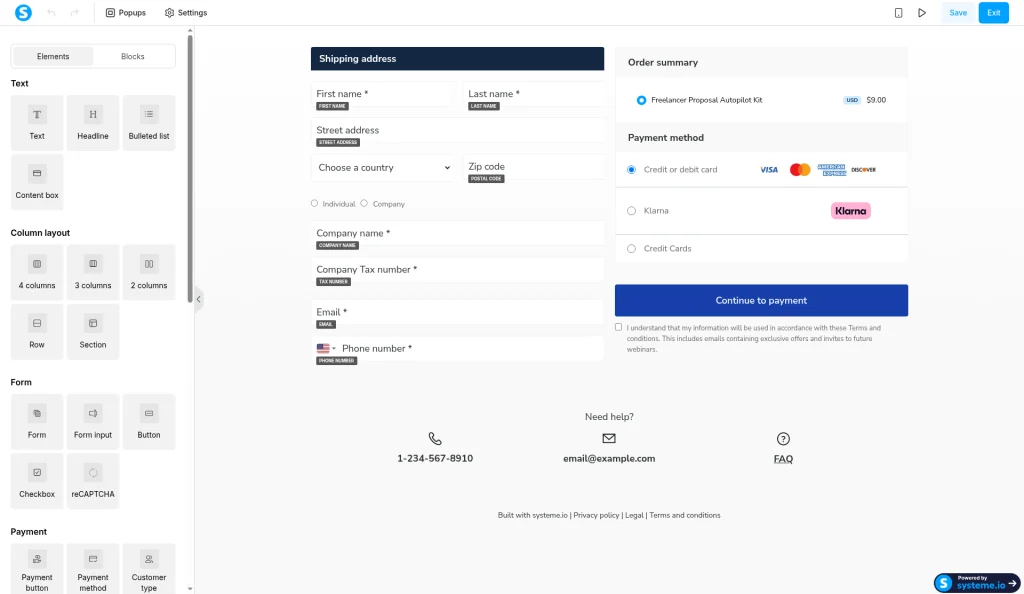
For a download you need far less. What we did:
- Deleted street address, zip code, Individual/Company, company name, company tax number and phone number. All of them could be deleted. We kept First name, Last name and Email (Stripe needs Email and First name).
- Country can't be removed. When we deleted it and clicked Save, Systeme.io showed: "The Country field is missing from the page. This field is required for the user to provide all the necessary information for their payment."
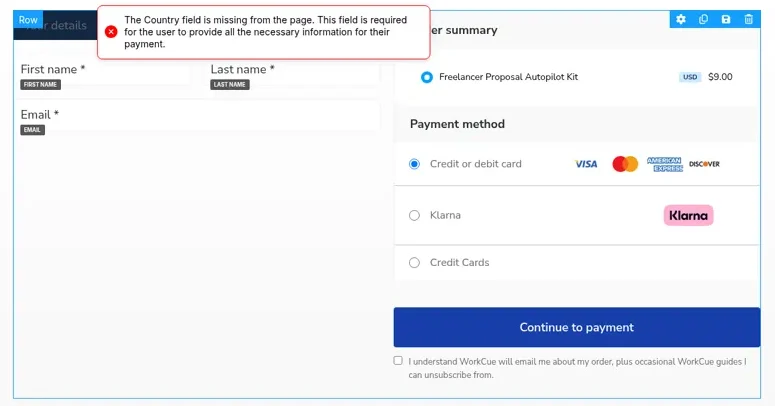
- Gotcha: the re-added Country field landed below the pay button, outside the form, and dragging it back up didn't work for us.
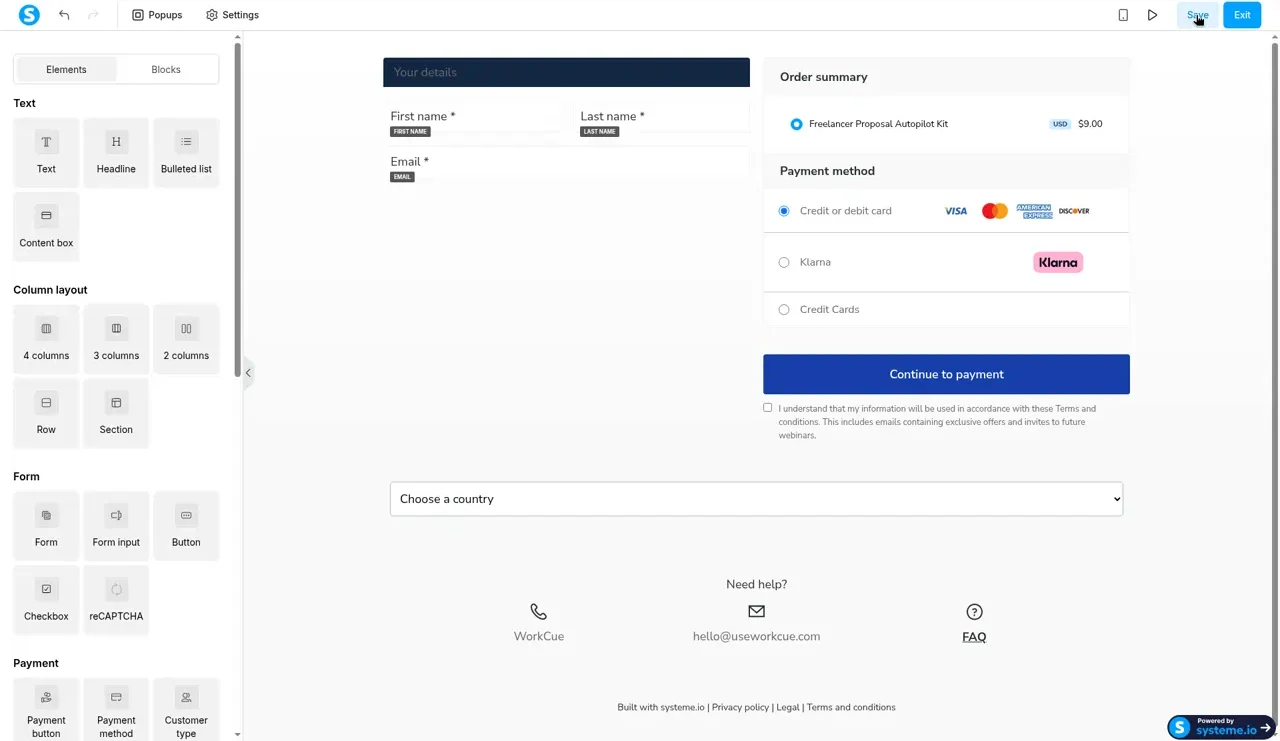
The fix that worked: duplicate the Email field (so the copy sits inside the form) and change the copy's type to Country. The live form then showed Country right under Email, defaulting to United States.
- Placeholders: we replaced the footer's phone and email with
hello@useworkcue.com. - Gotcha: the heading colour didn't stick. We renamed "Shipping address" to "Your details" and changed its text colour in the editor, but the live page still showed it grey after two tries. We left it grey. Grey on navy is hard to read, so check yours on the live page.
- The consent checkbox. The default text promises "exclusive offers and invites to future webinars" and links Systeme.io's own terms. We rewrote ours to: "I understand WorkCue will email me about my order, plus occasional WorkCue guides I can unsubscribe from." Write your own line and link your own terms, and make sure it only promises emails you actually send.
The editor showed a third payment option, "Credit Cards", under card and Klarna. It didn't appear on the live page.
Step 6: Deliver the file from the thank-you page
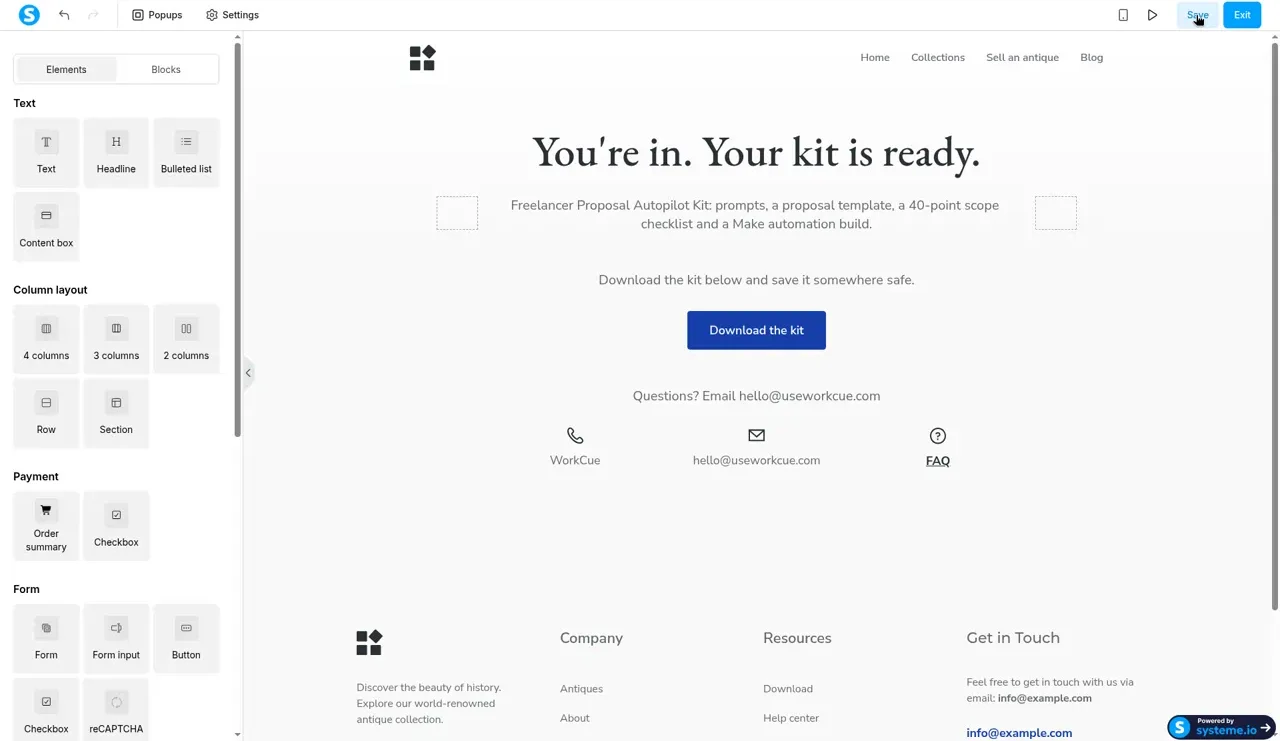
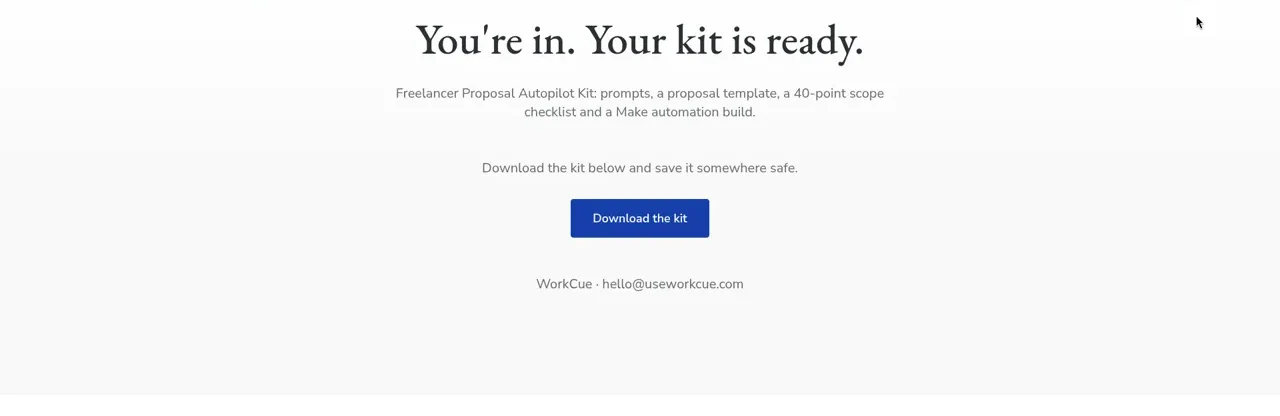
Open the Thank You Page step and pick a template. Ours was an antique shop demo, with a menu (Home, Collections, Sell an antique, Blog), a footer with info@example.com and a THANKYOU10 discount box. We removed all of it and wrote:
- Headline: "You're in. Your kit is ready."
- Text: what the kit contains, then "Download the kit below and save it somewhere safe."
- A button:
Download the kit - Footer line: WorkCue and our support email,
hello@useworkcue.com
To make the button deliver the file, select it and open its settings. Action when button clicked offers Submit form, Show popup, Open URL, Next step URL and Download file. We chose Download file and uploaded the kit's ZIP (Systeme.io's help on button actions).
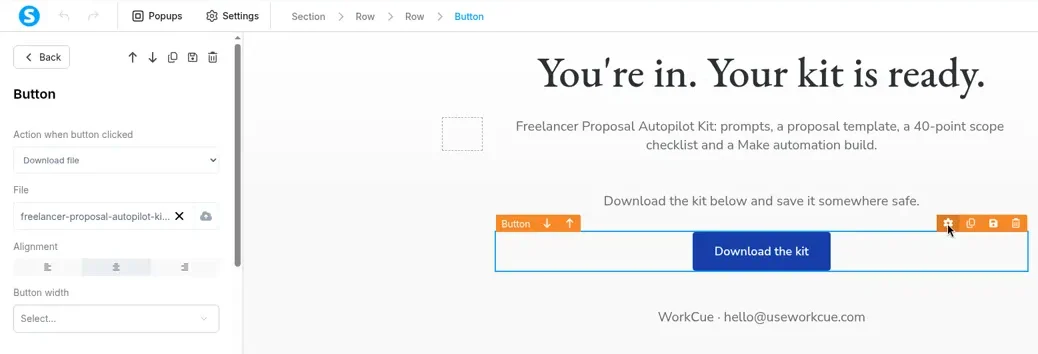
The trade-off. The uploaded file is served from a public CloudFront address. Anyone who has that link, or the thank-you page's address, can download the kit without paying. For a $9 template kit we accepted that. If it matters for your product, deliver it through a Systeme.io course instead. On Free that uses your one course.
No delivery email. Sending the download link by email would take an automation rule (and probably a tag), and the Free plan allows 1 of each. We use both for a free mini-course, so buyers of the kit get the file only on the thank-you page. Whether Systeme.io or Stripe sends a receipt on its own is one of the things we couldn't check without an order.
Step 7: Check the live page
Use View funnel step on the Order Form, or open the URL from the step's URL Path field. Each page gets your subdomain plus a random 8-character path (ours: a17babff); you can change it there.
On our live page (top of this guide): First name, Last name, Email and Country, then the order summary at $9.00, Credit or debit card with an Apple Pay button and card fields, Klarna, Continue to payment, our consent line, our contact email, and in the corner the "Powered by systeme.io" badge. On the Free plan you can't remove that badge (source), and it links to Systeme.io through the account's affiliate link. The footer also says "Built with systeme.io".
We didn't place a test order. Systeme.io has no Stripe test mode, and the only workaround its help suggests is a real charge that you refund afterwards, which may cost "additional fees" (source). We don't make real-money purchases in this series, so the charge itself, the redirect to the thank-you page after payment, receipts, the new contact record and the funnel's Sales stats are untested here. If you want to see the full flow, buy from your own order form with a real card and refund yourself from your Systeme.io account.
What the free plan did and didn't allow
Allowed on Free in this run: connecting Stripe, a Sell funnel with an order form and thank-you page, a digital product, a $9 one-time price plan, editing both pages, a Download file button with an uploaded ZIP, and publishing on the systeme.io subdomain. Systeme.io lists 0% transaction fees on every plan; Stripe's own fees still apply.
Limits we worked around: 1 automation rule and 1 tag for the whole account (so no delivery email here), 1 course (so no course-based delivery), 3 funnels in total, and a lifetime sales revenue limit of 10,000 USD on Free (source). Plus the badge you can't remove.
Not possible at all: a Stripe test-mode purchase.
Recap
- Connect a payment gateway first. On Free, price plans are blocked without one, and Systeme.io has no Stripe test mode.
- The statement descriptor is required (22 characters max), and the order form template asks for far more than a download needs. Delete what you can. Country stays, and if it lands under the pay button, duplicate Email and change its type to Country.
- Products have no file resource. Use a Download file button on the thank-you page, and know that the file link is public.
- Rewrite the consent checkbox in your own words, link your own terms, and make sure it matches what you really send.
The same kit is also on Gumroad. The rest of the series is on the Sell What You Know hub.
Related guides
Set up Kit on the free plan: sender, first form and a test subscriber
How we set up WorkCue's real Kit account on the free plan: signup, onboarding, what the plan includes, the sender and mailing address, Recommendations, a first inline form and a test subscriber taken all the way to Confirmed, with the gotchas we hit.
Deliver a PDF lead magnet with a Kit landing page on the free plan
We built the Kit landing page that delivers WorkCue's free 40-point scope checklist, on Kit's free plan: the Beacon template, double opt-in that starts the download, the confirmation email, publishing and an end-to-end test that landed in the Gmail Inbox.
Kit emails in Spam? Verify your sending domain (SPF, DKIM, DMARC)
We moved our Kit sender off a Gmail address and verified useworkcue.com on Kit's free plan, with Cloudflare's free DNS and Email Routing. Every record we added, what needs Kit Pro, and the before and after from one real Gmail test.